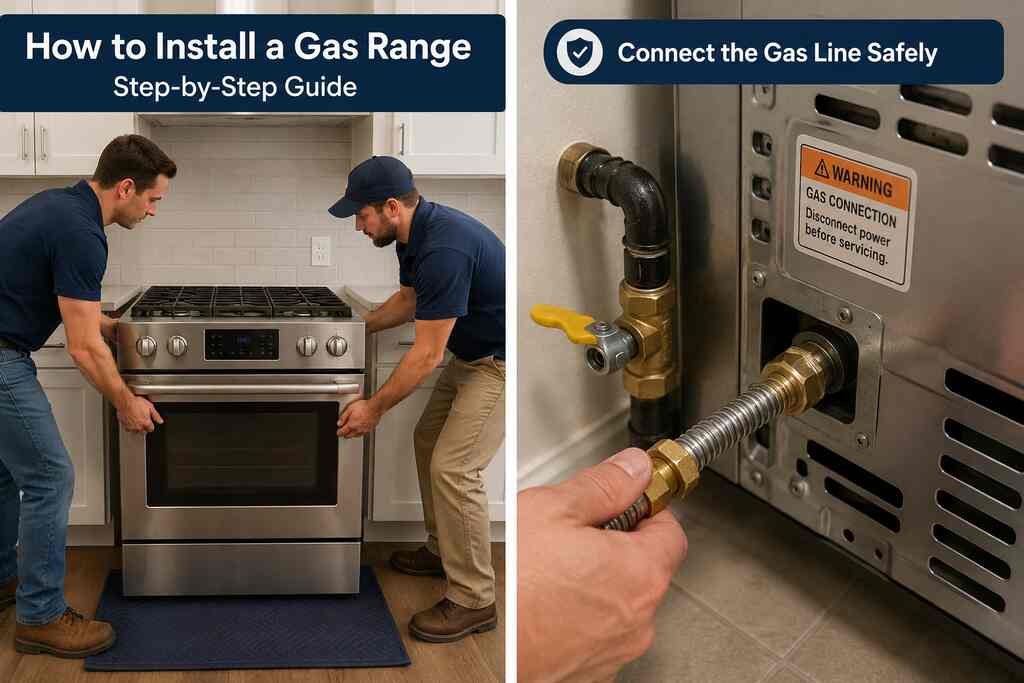
Learning how to install gas range appliances the right way is about more than getting the burners to light. Done wrong, a gas connection can leak, and a range that isn’t anchored properly can tip over. This guide walks through connecting a range to an existing gas line using a flexible connector, the same job most homeowners actually do. It also covers the safety steps that a lot of quick tutorials skip.
One thing to know upfront: this guide covers connecting a range to gas service that’s already running to your kitchen. If your home doesn’t have a gas line in place, that’s new pipe installation, and it needs a licensed professional.
Key Takeaways
- Learning how to install gas range connections safely means using a new, CSA or ANSI-listed flexible connector every time. Never reuse an old one.
- Many local codes require a licensed plumber or gas fitter for this work. Check with your municipality before starting.
- An anti-tip bracket is a CPSC safety requirement, not an optional step. It’s also the part most DIY guides skip entirely.
- Always test every connection for leaks with a proper detection solution, never an open flame, before you use the range.
How Long Does It Take to Install a Gas Range?
For a straightforward swap where the old range is already disconnected and the gas line and shutoff valve are in good shape, expect one to two hours from start to finish, including the leak test. Add extra time if you also need to install or relocate a shutoff valve, since that step is more involved and, depending on your local code, may need a licensed plumber regardless of how comfortable you are with the rest of the job. Rushing the leak-test step is the most common way this timeline goes wrong, so build in time to wait and watch rather than assuming a quick check is enough.
Natural Gas vs. Propane: Does It Change the Installation?
The connection process for how to install gas range appliances is largely the same for natural gas and propane. The two fuels aren’t interchangeable without adjustment, though. Most ranges ship configured for natural gas. They require a conversion kit, usually included in the box or available from the manufacturer, to run safely on propane. The kit swaps out the burner orifices for smaller ones sized to propane’s higher pressure. Never run a range on propane without the correct orifices installed. It’s a genuine safety issue, not just a performance one.
Before You Start: Permits, Codes, and When to Call a Pro
Gas work is one of the few home projects where “close enough” isn’t good enough. Many U.S. municipalities require a permit and a licensed plumber or gas fitter for any gas line connection, even a simple appliance swap. Check with your local building department before starting. If you smell gas at any point, stop immediately. Don’t flip any switches; leave the house and call your gas utility or 911 from outside.
If your existing setup already has a capped gas line and shutoff valve in place from a previous range, connecting a new appliance is a reasonable DIY project. It suits someone comfortable with basic plumbing tools. According to licensed plumbers interviewed by Family Handyman, most gas stoves use either a 3/8″ or 1/2″ threaded connector, and the job is manageable for a confident DIYer once gas service already reaches the kitchen. If you’re running new gas pipe, moving the gas line, or don’t have an existing shutoff valve, hire a licensed professional.
Tools and Materials You’ll Need
- New flexible gas connector, listed to ANSI Z21.24/CSA 6.10, sized to match your range’s fitting (usually 3/8″ or 1/2″)
- Two adjustable wrenches
- Yellow gas-rated PTFE tape (for threaded NPT connections only, not flare fittings)
- Non-corrosive, chloride-free leak detection solution
- A level
- Anti-tip bracket (usually included with the range)
- Drill and screws for the anti-tip bracket
How to Install Gas Range Connections: Step by Step
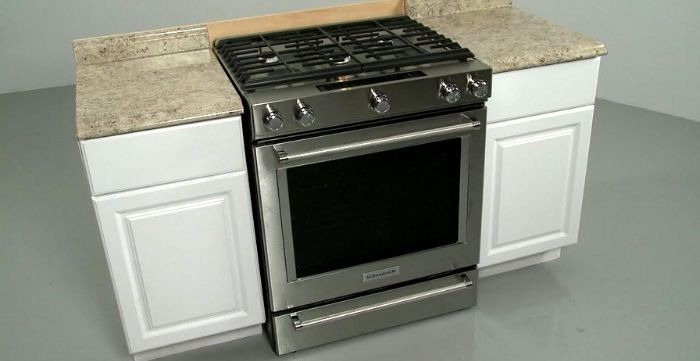
Step 1: Prep the Space and Shut Off the Gas
Clear the installation area completely and make sure it’s well ventilated. Locate the shutoff valve behind or near where the range will sit. Turn it to the closed position, perpendicular to the pipe. If there’s no accessible shutoff valve, that needs to be installed before you go any further. That step often requires a licensed plumber, depending on your local code.
Step 2: Confirm the Shutoff Valve Is Accessible
Code requires a manual shutoff valve within 6 feet of the appliance, in the same room, and never hidden behind a wall, floor, or cabinet panel. If your current valve doesn’t meet that, this is the point to fix it rather than work around it.
Step 3: Prepare the New Connector
Never reuse an old flexible connector when installing a new range. Manufacturer and code requirements both call for a fresh, properly sized connector every time. Check the threaded ends. If they’re NPT (tapered) threads, wrap them with yellow gas-rated tape, going clockwise so the tape doesn’t unwind as you tighten. If the fitting uses a flare connection instead, skip the tape entirely. Flare fittings seal metal-to-metal and tape actually interferes with the seal.
Step 4: Connect the Line to the Range and Supply
Attach one end of the connector to the range’s gas inlet. Attach the other end to the shutoff valve. Use two wrenches for this: one to hold the fitting steady, the other to turn the connector nut. This keeps you from putting stress on the rigid supply pipe while you tighten. Snug the connection firmly, but don’t overtighten past what the fitting needs to seal.
Step 5: Test Every Connection for Leaks
This step isn’t optional. Turn the gas supply back on and apply a non-corrosive, chloride-free leak detection solution to every joint you touched. Regular dish soap can contain chlorides that corrode metal fittings over time, so use a product made for this. Bubbles forming at a joint mean a leak. If you find one, shut the gas back off, retighten or rewrap the connection, and test again. Never use an open flame to check for leaks.
Step 6: Level the Range and Connect Power
Most gas ranges still need a standard 120V outlet for the igniter, clock, and control board. That’s true even though the cooktop itself runs on gas. Plug in the range, then use a level to check it front-to-back and side-to-side. Adjust the leveling legs at the base until it’s stable and even.
Step 7: Install the Anti-Tip Bracket
This is the step most tutorials skip, and it’s a genuine safety requirement, not a suggestion. According to the U.S. Consumer Product Safety Commission, range tipovers have caused dozens of fatalities and thousands of injuries. Young children who climb on an open oven door are disproportionately affected. Every range sold since 1991 is required to meet stability standards that assume an anti-tip bracket is installed. The bracket typically comes with the range and mounts to the wall or floor behind it. It engages a bracket on the range’s rear leg once the range is pushed into place. Don’t skip this step, even if the range feels stable without it.
Step 8: Turn On the Gas and Test the Burners
With everything connected, leveled, and leak-tested, turn the gas supply valve fully open. Light each burner briefly to confirm even, blue flames across all of them. A burner that sputters, burns yellow, or won’t stay lit may need cleaning or adjustment before regular use.
Watch: A Full Gas Range Installation Walkthrough
Seeing the connection process in real time helps clarify the wrench technique and connector handling described above.
Common Mistakes That Cause Leaks or Code Violations When You Install a Gas Range
- Reusing an old connector: Connectors degrade over time and aren’t rated for reuse on a new installation.
- Taping flare fittings: Tape prevents a proper metal-to-metal seal on flare connections and can actually cause a leak.
- Skipping the anti-tip bracket: One of the most commonly missed steps, and the one with the most serious safety consequences.
- Concealing the shutoff valve: It must stay visible and accessible, never behind a cabinet panel or inside a wall.
- Joining two connectors together: Code requires a single connector per appliance, not two pieced together to reach.
- Testing with a flame: Always use a proper leak detection solution, never a lighter or match.
Frequently Asked Questions
What’s the first step in how to install gas range connections safely?
Clear the space, confirm the shutoff valve is accessible, and shut off the gas supply before touching any fittings. Never start working on a live connection.
How long does a typical gas range installation take?
For a straightforward swap with an existing shutoff valve in good condition, plan on one to two hours including the leak test. Installing or relocating a shutoff valve adds significant time and may require a licensed plumber.
Can I install a gas range myself?
If you’re connecting to an existing capped gas line with an accessible shutoff valve, many homeowners handle this themselves. If you’re running new gas pipe or don’t have an existing shutoff, hire a licensed professional. Check your local permit requirements either way.
What size connector do I need to install a gas range?
Most residential ranges use either a 3/8″ or 1/2″ fitting. Match the connector to your specific range’s inlet size and the size of your home’s gas supply line. Confirm it’s listed to ANSI Z21.24/CSA 6.10.
How do I know if my gas range installation has a leak?
Apply a non-corrosive, chloride-free leak detection solution to every connection point after turning the gas back on. Bubbles indicate a leak. You can also watch for the distinct rotten-egg smell added to natural gas for detection, or a hissing sound near a fitting.
Do I really need an anti-tip bracket?
Yes. It’s not just a nice-to-have. The CPSC has documented dozens of tipover fatalities, many involving children. Every range manufactured since 1991 is designed around the assumption that the bracket will be installed.
Does a gas range need an electrical outlet too?
Most do, even though the cooktop and oven run on gas. The igniter, clock, and electronic controls typically need a standard 120V outlet nearby.
Can I install a gas range on propane without any changes?
No. Most ranges ship set up for natural gas and need a conversion kit with different burner orifices to run safely on propane. Check your owner’s manual before connecting a natural-gas-configured range to a propane supply.
Final Thoughts
Knowing how to install gas range connections properly comes down to a few habits: use the right materials, test every joint before you trust it, and don’t skip the anti-tip bracket. The connection itself is a manageable weekend project for many homeowners. Gas work leaves less room for error than most home projects, though, so when in doubt, or when your local code requires it, bring in a licensed professional instead.
If you’re still deciding on the right appliance, our guide to choosing a gas range for your kitchen covers BTU output, burner layout, and installation styles. If you’re weighing gas against other fuel types, see what a dual fuel range offers and the real difference between a range and a stove before you buy.

Hey, My name is MAMON. I am a SEO content creator and affiliate marketer with over 8 years of experience. I create honest product reviews, in-depth buying guides, and practical how-to articles to help readers make informed decisions. My mission is to provide trustworthy, research-backed content that delivers real value.
Leave a Reply