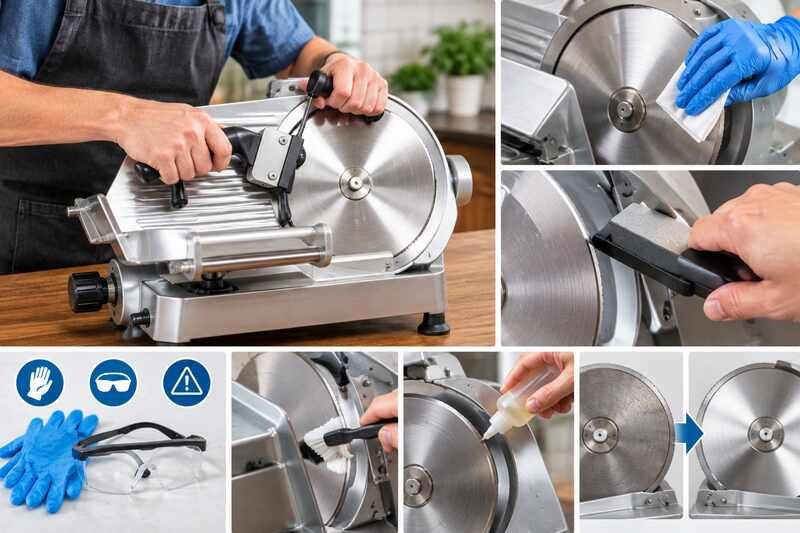
Knowing how to sharpen a meat slicer blade safely is one of the most important maintenance skills for anyone who runs a slicer at home or behind a deli counter. A dull blade does not just tear your slices, it forces you to push harder, and pushing harder on a spinning blade is exactly how kitchen injuries happen. This guide walks through how to tell when your blade needs attention, the safety steps to take before you touch it, the sharpening process itself, and how to keep your stones and wheels in good shape between sessions.
Key Takeaways
- Regular sharpening keeps a meat slicer cutting cleanly and safely for years.
- Always unplug the slicer and put on cut-resistant gloves before you touch the blade.
- Many commercial slicers (Manconi, Berkel, Globe, and similar brands) use a built-in twin-wheel sharpener; models without one need a separate stone, honing rod, or professional service.
- Sharpen at the first sign of ragged or uneven slices, not after the blade is already failing.
- Clean the sharpening wheels and stones after every use to stop metal dust from dulling the next edge.

Recognizing When Your Meat Slicer Needs Sharpening
When slices start tearing instead of gliding cleanly off the blade, sharpening is overdue. Catching the problem early protects both your product yield and your fingers, since a dull blade requires more hand pressure to feed food through.
Signs of a Dull Blade
- Cuts become uneven or ragged, which increases waste and trimming time.
- The blade drags and tears food instead of producing clean, even slices.
- Routine slicing takes noticeably longer and the motor sounds like it’s working harder.
- Visible nicks, flat spots, or dull zones appear when you inspect the edge with the machine unplugged.
- You find yourself pressing food into the blade rather than letting the blade do the work, a common precursor to a slipped-hand injury.
| Symptom | Likely Cause | Recommended Action |
|---|---|---|
| Uneven slices | Dull or nicked blade edge | Inspect the edge; use a stone or built-in sharpener for light honing |
| Increased waste or ragged edges | Blade has lost its edge geometry | Schedule sharpening and check the blade alignment |
| Machine drags or bogs down | Built-up residue or a worn edge | Clean the carriage and blade housing; inspect and replace if needed |
Essential Safety Protocols Before You Begin
Before you touch any part of the blade or sharpener, unplug the machine and set up a clear, well-lit workspace. The Occupational Safety and Health Administration’s guidance on food-slicing equipment flags cleaning, sharpening, and maintenance as leading causes of slicer-related cuts and amputations, because these are the moments workers touch the blade directly (OSHA Poultry Processing eTool: Cuts and Lacerations). The same logic applies just as much in a home kitchen as it does on a commercial line.

- Always disconnect the slicer from the wall outlet first. Never work on a plugged-in machine, even if the power switch is off.
- Wear cut-resistant gloves any time your hands are near the blade, whether you’re cleaning it, removing it, or sharpening it.
- Never touch the blade edge with a bare finger. Use gloves or a dedicated tool to check for nicks.
- Choose the correct sharpening stone or honing rod for your blade type. The right grit preserves edge geometry instead of wearing it down unevenly.
- If your slicer uses a built-in sharpener, keep the guard and locking knob in good working order. A sharpener that will not lock securely in place is a safety issue, not just an inconvenience.
- Reputable commercial slicer brands, including Manconi, build their machines to meet U.S. electrical safety and food-equipment sanitation standards (look for UL or NSF certification marks on the nameplate), which matters when you’re buying replacement parts or a new unit.
- Store your sharpener and stones away from the blade area, and inspect the blade for nicks before returning the machine to service.
- If you ever feel unsure at any step, stop and consult your owner’s manual or a professional technician rather than guessing how to sharpen a meat slicer blade on an unfamiliar model.
“Personal protection and a powered-off machine are the two best defenses against accidents during meat slicer maintenance.”
How to Sharpen a Meat Slicer Blade Correctly
Start every sharpening session the same way: unplug the machine, put on cut-resistant gloves, and clear the workspace. The exact steps you follow next depend on whether your slicer has a built-in sharpener or not.
If Your Slicer Has a Built-In Twin-Wheel Sharpener
Many commercial and prosumer slicers, including Manconi, Berkel, Globe, and Hobart models, come with a sharpener assembly mounted on the machine itself. Here’s how to use it:
- With the machine unplugged, set the graduated thickness knob to zero and wipe the blade clean of any food residue with a degreasing product.
- Unscrew the sharpener’s locking knob and lift the sharpener assembly up and away from its resting position.
- Rotate the sharpener 180 degrees so the blade edge sits between the two sharpening wheels, then lower it back into place.
- Screw the locking knob back down to secure the sharpener firmly against the blade.
- Reconnect the machine to power, then press and hold the button on the slicing wheel for about 6 to 8 seconds.
- If the edge still feels rough or slices are not clean, repeat the 6 to 8 second pass two or three more times.
- Unplug the machine again, unscrew the locking knob, and return the sharpener to its original resting position before removing it entirely.

If Your Slicer Does Not Have a Built-In Sharpener
Plenty of home and light-duty slicers, especially entry-level and manual models, skip the built-in sharpener altogether. For these, you have two realistic options: hand-sharpen the removed blade with a fine sharpening stone or diamond hone, following the blade’s existing bevel angle in smooth, even passes, or send the blade out to a professional sharpening service, which is often the safer and more consistent choice for a beveled slicer blade that most home sharpening rods were not designed to handle. If you are not confident holding the correct angle by hand, the second option protects both the blade and your fingers.
Tools You Need to Sharpen a Meat Slicer Blade at Home
You don’t need a full workshop to sharpen a meat slicer blade at home, but a few basics make the job faster and safer. At minimum, keep cut-resistant gloves, a fine-grit sharpening stone or diamond hone rated for slicer blades, a soft-bristle brush, a degreasing cleaner, and a lint-free cloth on hand. If your machine has a built-in sharpener, you technically only need the gloves and cleanup supplies, since the sharpener itself does the honing work. If you’re hand-sharpening a removed blade, a stone with a coarse side for reshaping a badly worn edge and a fine side for polishing gives you the most flexibility without buying two separate tools. Once you have these on hand, knowing how to sharpen a meat slicer blade safely comes down to following the right sequence for your machine, not owning expensive equipment.
Post-Sharpening Cleanup
Once sharpening is done, remove the sharpener wheels or stone and clean them with warm water, a mild degreasing product, and a soft brush. Wipe down the blade and the surrounding carriage to remove every trace of metal filings and dust before the slicer goes back into food service.
- Tip: Machines with easily removable sharpener assemblies, a feature Manconi and similar brands build in, make this cleanup step faster and reduce the chance you’ll miss trapped metal dust.
- Store stones and rods dry, and give the blade one more visual check before your next shift.
Maintaining Your Sharpening Stones and Equipment
A neglected stone or sharpening wheel traps metal filings and grit, which dulls your next edge faster than normal wear ever would. A few minutes of care after each session keeps your tools working the way they should.
Cleaning Your Sharpening Wheels or Stones
Remove the wheels or stone and rinse them with warm water and a degreasing product, using a brush to lift out embedded metal particles. Dry every part completely before you put it back into storage. Wet stones and wheels lose grit faster and wear out sooner than ones stored dry.
Tip: Wipe down the area around the sharpener mount, too. Metal dust that settles nearby can end up on food during the next slicing session.
Choosing Replacement Parts
When a stone, rod, or wheel wears out, replace it with a part rated for your specific slicer model. Mismatched grit or diameter can throw off your blade’s edge geometry. National Band Saw is one established U.S. supplier that stocks sharpening and replacement parts compatible with Hobart, Bizerba, Globe, and Berkel slicers. Manconi and most other manufacturers also sell OEM parts directly through their own dealer networks. A new stone or wheel is a far smaller expense than a new sharpener assembly, so it’s worth replacing worn parts before they cause uneven sharpening.
“Investing in quality replacement parts saves time and keeps every cut consistent.”
| Vendor Type | Brand Support | Compatibility Notes |
|---|---|---|
| National Band Saw | Hobart, Bizerba, Globe, Berkel | Established parts distributor; check your model number before ordering |
| OEM Suppliers | Manufacturer-specific (Manconi, Berkel, Globe, etc.) | Exact fit for your machine; the safest choice for edge geometry |
| Aftermarket Options | Multiple brands | Often cheaper; verify grit rating and material before buying |
How Often Should You Sharpen a Meat Slicer Blade?
For a slicer used daily in a deli or commercial kitchen, plan on sharpening roughly every one to two weeks, or sooner if you notice ragged slices before then. A home slicer used a few times a month can often go two to three months between sharpenings. The real signal is always performance, not the calendar: if the blade is tearing food or you’re pressing harder than usual to get a clean slice, it’s time, regardless of how recently you last sharpened it.
Sharpening is only one part of the bigger maintenance picture. Pair a regular sharpening schedule with the broader upkeep steps in our guide on how to maintain a meat slicer for long-lasting use, which covers lubrication, carriage adjustment, and other tasks that keep the whole machine, not just the blade, running well for years.
Frequently Asked Questions
Do I need to sharpen a brand-new meat slicer blade?
No. New blades ship sharp from the factory. Focus on cleaning and light honing to maintain that factory edge rather than sharpening it right away.
Can I sharpen a meat slicer blade without removing it from the machine?
Yes, if your slicer has a built-in twin-wheel sharpener, since that assembly is designed to work with the blade still mounted. If you’re hand-sharpening with a separate stone, most home users find it easier and safer to remove the blade first, always with the machine unplugged.
How do I know if my slicer has a built-in sharpener?
Check the housing near the blade for a knob or lever labeled “sharpen” or a small twin-wheel attachment. If you don’t see one and your manual doesn’t mention sharpening steps, your model likely relies on a separate stone, rod, or professional service instead.
What’s the safest way to sharpen a meat slicer blade without a built-in sharpener?
Unplug the machine, put on cut-resistant gloves, and remove the blade following your manual’s instructions before you touch it with a stone or rod. Working on a removed blade, rather than one still mounted in the machine, keeps your hands well clear of the carriage and any exposed edge you’re not actively sharpening. If you’re at all unsure about the blade’s bevel angle, a professional sharpening service is a safer bet than guessing by hand.
Conclusion
A short maintenance session can restore cutting quality and prevent the wasted product, slower prep, and safety risk that come with a dull blade. Keep your meat slicer clean, learn how to sharpen a meat slicer blade the right way for your specific model, and check the edge regularly so small problems never turn into bigger ones.
Beyond sharpening, routine care matters just as much. Learn how to clean a meat slicer safely after every use, follow safe habits any time you use a meat slicer, and know when it’s time to replace a meat slicer blade instead of sharpening it again. Together, these habits keep your kitchen efficient, your food service running smoothly, and your hands safe every time you reach for the slicer.

Hey, My name is MAMON. I am a SEO content creator and affiliate marketer with over 8 years of experience. I create honest product reviews, in-depth buying guides, and practical how-to articles to help readers make informed decisions. My mission is to provide trustworthy, research-backed content that delivers real value.
Leave a Reply