
Knowing how to use a stand mixer correctly comes down to five things: a stable surface, the right attachment, the correct speed, close supervision, and unplugging it before you touch any moving part. Get those five right and you’ll turn out better batters, doughs, and whipped ingredients while keeping your hands, your countertop, and your motor safe for years of baking.
A stand mixer is one of the hardest-working appliances in a U.S. kitchen, but it’s also a machine with real torque behind it. Treat it with a little respect and it will reward you with smoother batters, better-kneaded dough, and years of reliable service.
Key Takeaways
- Always place your stand mixer on a flat, stable surface before turning it on. A wobbling base is the leading cause of spills and tip-overs during mixing.
- Match the attachment to the task: flat beaters for batters, whisks for whipping, and dough hooks for bread. Using the wrong one strains the motor.
- Start on the lowest speed and build up gradually. Jumping straight to high speed is a common cause of flour clouds, splatters, and motor strain.
- Unplug the mixer before attaching, removing, or cleaning any part. This single habit prevents most stand mixer injuries.
- Never leave a running mixer unattended, and keep hands, utensils, and loose clothing away from the moving head and bowl.
Why Stand Mixer Safety Actually Matters
A stand mixer looks harmless sitting on the counter, but the same planetary action that whips egg whites into stiff peaks can just as easily catch a sleeve, a spatula, or a stray strand of hair. Consumer Reports notes that the best mixers let you lock the powerhead securely in both the up and down positions, specifically so the beaters can’t crash into the bowl or ride up out of thick dough while running. That locking mechanism only works if you use it, and the rest of the safety picture depends on how you operate the machine day to day.
Most kitchen mixer injuries aren’t dramatic. They’re small, avoidable moments: a hand reaching in to scrape the bowl while the beater is still turning, a mixer that walks across the counter because it wasn’t seated properly, or a cord left dangling where a child can grab it. None of that requires an expensive machine to prevent. It just requires a repeatable routine, which is exactly what the steps below give you.
Know Your Mixer: Tilt-Head vs. Bowl-Lift
Before you start mixing, it helps to know which type of machine is on your counter, since the setup steps differ slightly.
Tilt-head mixers have a head that tips back on a hinge, giving you open access to the bowl for adding ingredients or swapping attachments. Bowl-lift mixers keep the head fixed in place while the bowl itself rises and locks onto support arms, a design more common on larger, higher-capacity models.
Both styles use the same core safety habits: a stable base, a correctly locked bowl, the right attachment, and a controlled ramp-up in speed.
Step-by-Step: How to Use a Stand Mixer Safely
1. Place It on a Flat, Stable Surface
Set your mixer on a solid, level countertop with enough clearance on all sides. A wobbly or tilted surface lets the machine rock as the beaters work, which can walk it toward the counter’s edge or splash ingredients over the rim. If you store your mixer in a cabinet between uses, give it a firm, flat landing spot every time you pull it out rather than balancing it on a stack of towels or a warped tray.
2. Choose and Attach the Right Accessory
Every stand mixer ships with a small set of interchangeable tools, and picking the correct one matters more than most home bakers realize.
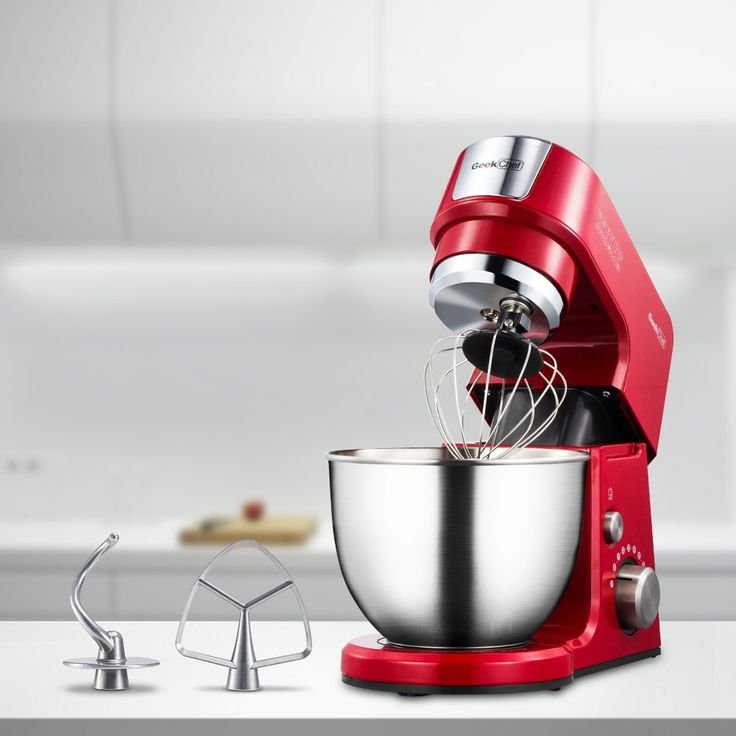
- The flat beater handles the bulk of everyday mixing: creaming butter and sugar, combining cake batter, and mashing potatoes.
- The wire whisk incorporates air, so it’s the one to reach for with whipped cream, meringue, and egg whites.
- The dough hook kneads bread, pizza, and pasta dough without the arm workout a wooden spoon demands.
KitchenAid’s own step-by-step guide walks through attaching accessories to the mixer shaft and points out that matching the tool to the recipe is the first real decision you make before mixing even begins. Always attach or remove accessories with the mixer off and unplugged, and follow the twist-and-lock or push-to-click motion described in your model’s manual.
3. Secure the Mixing Bowl
How you lock the bowl in place depends on your mixer type.
Tilt-head models: Align the bowl with the clamping plate, press down gently, and twist clockwise until it clicks into place.
Bowl-lift models: Turn the speed control to off and unplug the mixer first. Lower the bowl-lift handle, position the bowl on the support arms, and raise the handle until you hear the latch snap into place.
Either way, give the bowl a light tug once it’s locked. If it shifts, it isn’t seated correctly, and running the mixer with a loose bowl is one of the fastest ways to spill a full batch of batter.
4. Add Ingredients in the Right Order
Tilt the head back or lower the bowl before adding anything, so you have clear room to see what you’re pouring in and how much room the bowl has left. Add dry and wet ingredients in the order your recipe calls for. Dumping everything in at once often leads to uneven mixing and unnecessary splatter once the beater starts turning.
5. Start on Low Speed, Then Build Up
Stand mixers typically offer anywhere from six to twelve speed settings. Always start at the lowest one to fold ingredients together before increasing speed gradually. Jumping straight to a high setting is what sends flour clouds into the air and batter up the sides of the bowl, and on stiff bread dough it can strain the motor. Consumer Reports points out that a low first speed also helps prevent splattering compared with mixers that start higher.
6. Stay Nearby and Watch the Mix
A running mixer needs an adult present the entire time, not just at the start. Watch for over-mixing, which can toughen baked goods or deflate whipped ingredients, and listen for any change in the motor’s sound that might signal it’s struggling with a heavy load. If you need to step away for even a minute, turn the mixer off and unplug it first.
7. Power Down, Unplug, and Remove the Bowl
When mixing is done, switch the machine off, unplug it, then release the bowl and detach the beater or hook. Scrape down the bowl with a spatula only after the attachment has fully stopped turning. Never reach in while it’s still spinning, even if it looks like it’s slowing down.
Common Stand Mixer Mistakes to Avoid
- Overloading the bowl. Every model has a maximum capacity. Exceeding it strains the motor and increases the odds of a spill.
- Using the wrong attachment for stiff dough. A whisk isn’t built for bread dough, and forcing it through a heavy load can bend the wires or overheat the motor.
- Skipping the manual. Every stand mixer model comes with its own specifications and safety notes, and the manufacturer’s manual is the most reliable source for model-specific guidance, from maximum speeds for yeast dough to which parts are dishwasher-safe.
- Leaving the cord within reach of kids or pets. Route the cord away from the counter’s edge, and unplug the mixer when it’s not actively in use.
- Storing attachments while still on the machine. Detach beaters, whisks, and hooks before putting the mixer away, and give the bowl and tools a full clean first so residue doesn’t harden between uses.
Cleaning and Maintenance for a Safer Mixer
A well-maintained mixer isn’t just longer-lasting, it’s safer to operate. Always unplug the base before wiping it down, and keep the motor housing away from water entirely. Most beaters, whisks, and dough hooks are dishwasher-safe, though a large mixing bowl often won’t fit and is better washed by hand. Stainless steel bowls should be cleaned with warm, soapy water rather than steel wool or bleach, which can dull or damage the finish. Wipe down the attachment shaft after every use so residue doesn’t build up and interfere with how securely the next accessory locks into place.
If your mixer ever makes an unfamiliar grinding noise, gives off a burning smell, or the bowl no longer locks securely, stop using it and check the manual or contact the manufacturer before running it again.
Watch It in Action
Reading through the steps helps, but watching a stand mixer set up and run in real time makes the motions click faster, especially the bowl-locking and attachment steps.
Frequently Asked Questions
What speed should I use for yeast dough? Keep yeast dough on the lowest one or two speed settings. Higher speeds can overheat the motor and overwork the gluten, leaving bread dense instead of light.
Can I leave my stand mixer running unattended? No. Stay in the kitchen the entire time it’s running, and unplug it any time you need to step away, even briefly.
Do I need different bowls for different mixers? Bowl-lift and tilt-head mixers use different locking systems, so bowls generally aren’t interchangeable between the two types. Check your model’s manual before buying a replacement or extra bowl.
How do I know if I’m overloading my mixer? If the motor sounds strained, slows noticeably, or the mixer starts “walking” across the counter, you’re likely pushing it past capacity. Scale back the batch size or switch to a heavier-duty model for large-volume baking.
Choosing the Right Mixer for Safe, Easy Use
The safety habits above apply no matter which model sits on your counter, but the right machine makes safe use easier from the start. If you’re still shopping, our guide to what a stand mixer is used for and how it works is a good starting point, and our roundups of the best affordable stand mixers and budget-friendly stand mixer picks can help you find a reliable option without overspending. If you’re comparing compact machines, our Dash stand mixer buyer’s guide covers a few lightweight models worth a look.
A stand mixer earns its space on the counter fast once you know how to run it safely. Set it on a stable surface, use the right attachment for the job, start slow, stay close by, and unplug before you touch any moving part. Follow those habits every time, and your mixer will keep turning out better bakes for years to come.

Hey, My name is MAMON. I am a SEO content creator and affiliate marketer with over 8 years of experience. I create honest product reviews, in-depth buying guides, and practical how-to articles to help readers make informed decisions. My mission is to provide trustworthy, research-backed content that delivers real value.
Leave a Reply