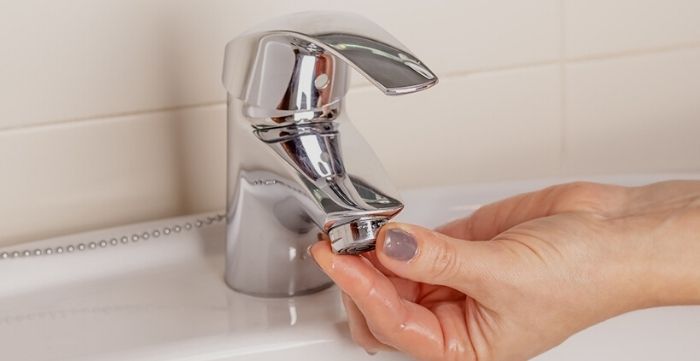
Water is very essential necessary in our daily life and our usable water source on this planet is limited. For this reason, all those government around the world has enforced the act to save our mineral water through every possible way. And one of them is to use an aerator on the spout of your kitchen faucet.
As a result from 1994 to still now all those faucet companies use a water restrictor on the spout of a kitchen faucet to save water. But sometimes this water restrictor works too much and makes the water flow slower like a turtle.
As a result, you can’t even wash your dishes properly. In this case, you may try to remove the water restrictor though it’s not a good decision. But sometimes you may need to do it.
A water restrictor is basically made of nylon fiber which is a circular-shaped deferment with multiple tiny holes around 10-30.
You can remove this water restrictor very easily with your hands but sometimes you may need some little tools and techniques. If your hand is not enough to unscrew the aerator then you need a towel, a wrench, and a flat-headed screwdriver. To grasp the art of separating this water restrictor read this article attentively.
How to Remove the Flow Restrictor from Your Kitchen Faucet?
Removing the flow restrictor is pretty easy. You just need to go through a few steps. This will cost you a little time and effort. Let’s discuss those steps.
-
Precaution
You need to turn off the water supply lines first. There are two water supply line valves under your sink. If you go down, you’ll be able to find them. You have to turn those valves counterclockwise to turn them off. After you do, you have to drain the water left inside the faucet and the hoses.
-
Step 1
Spread out the towel on your sink if you are not going to lose those tiny screws. Before unscrewing the aerator put a rag on it. It will secure the aerator from any kind of stain or damage. Now unscrew the aerator with a wrench.
You can also use a rubber-strapped wrench instead of using the rag on the aerator if it’s available around you.
-
Step 2
After separating away from the aerator, you need to take away the towel carefully from the basin. And put them in a safe place. Now turn on the faucet and let it run for a while to come out all those dirt and clogs from inside the hole.
You need to clean up the junked aerator with a considerable force of water. If it’s not cleaned up with the water therapy then you need to put it down under the boiled water or a vinegar bowl for 1-3 hours. But you must clean it properly.
-
Step 3
Behind the aerator there is the water restrictor with multiple holes, that’s what restrains the excessive water pressure, you can remove it by using your fingers if your fingers don’t work then use a pincer. You can get these pincers like devices from any hardware store.
If you remove it from your aerator permanently then you will get water flow at the full speed but this water may not enough safe to drink. Besides, sometimes you may face hard water issues. Hard water contains potassium, magnesium, and other mineral deposits. The flow restrictor prevents these from coming with water. If you remove the restrictor, you have to face these things.
-
Step 4
Run the flush to make sure that there is no debris or aerator part clinging inside the faucet hole. If there left any part of the aerator when you were separating it out then it may cause a gurgling or cranky sound later whenever you are going to use the faucet.
Use each of the hot and cold water lines of your faucet for 30 to 40 seconds. To test it how does it work actually without an aerator.
If it works well then stop the flush and clean again all those rust, clogs, and debris from inside the hole of this faucet pipe.
-
Step 5
The last step is the most important part of this content so be careful when you are re-screwing and re-organizing all the settings.
In this part, you need to set up the aerator without the water restrictor on the spout of your faucet. So notice carefully because sometimes there remains a water restrictor more than one inside the aerator.
Now set the aerator on the face of the faucet with your hand if it’s a female threaded faucet head. If it’s not a female threaded then use a flat-headed screwdriver or a rubber-strapped wrench to tighten it up strictly. You must tighten it up strictly without causing any harm to the aerator. Because without the water restrictor the flow of water will be 10 times stronger than the usual flow.
After resettling everything you need to turn on the switch of the faucet. And check that everything works wonderfully.
If it doesn’t work then unscrew the faucet head again and check out that there may remain the water restrictor inside the aerator.
Conclusion
So, this is how you can remove the flow restrictor from your kitchen faucet. If you’re having trouble with your kitchen faucet water flow and you think the main culprit here is the flow restrictor, you can remove it with some necessary steps. But it’s recommended that not using the faucet without the flow restrictor. So, buy a new one that fits your faucet.
We’ve tried to cover the steps and everything. If you still have any questions, comment below to let us know. Visit our website for other articles.

Leave a Reply