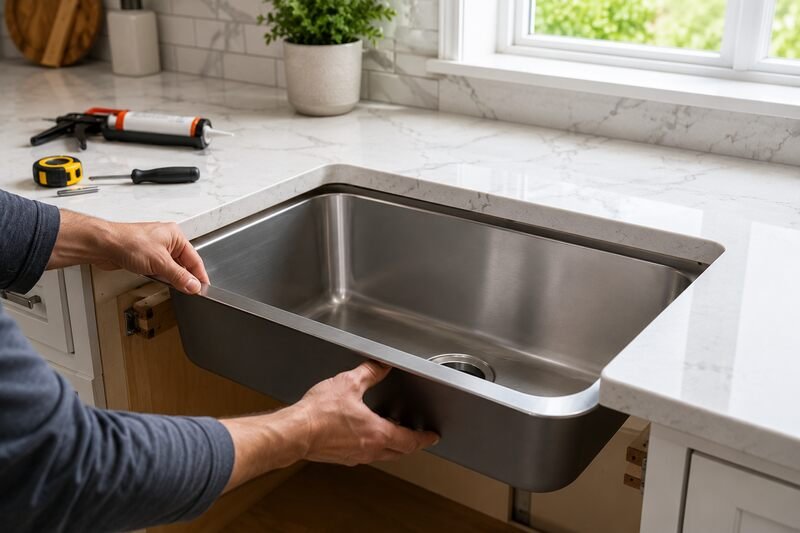
An undermount sink gives a kitchen that clean, seamless look. There’s no rim to catch crumbs, just a smooth transition from countertop straight into the basin. Knowing how to install undermount kitchen sink correctly matters more than with a standard drop-in model, though. That’s because the sink hangs entirely from the underside of the counter rather than resting on top of it. This guide covers the full process and the one countertop compatibility issue that trips up a lot of DIYers. It also covers when it’s worth calling in a professional instead.
Key Takeaways
- Install undermount sinks only on solid-surface countertops: granite, quartz, marble, concrete, or engineered stone. Standard laminate countertops are not suitable.
- Mounting clips or brackets hold up the sink, typically bonded with epoxy and reinforced with silicone sealant, not just glue alone.
- Let the sealant and epoxy fully cure, at least 24 hours, before using the sink.
- A support brace (wood and a temporary clamp or strap) holds the sink in place while adhesives cure. That’s standard professional practice, not a shortcut.
Which Countertops Work Before You Install an Undermount Kitchen Sink
This is the step most guides skip, and it’s the one that matters most before you buy anything. According to Lowe’s own installation guidance, use undermount sinks only with solid-surface and natural or engineered stone countertops. That means granite, quartz, marble, concrete, or solid surface materials like Corian. Manufacturers build standard laminate countertops around a particleboard or MDF core. Once the sink cutout exposes that core, it becomes vulnerable to swelling and delamination from ongoing moisture exposure. Elkay, a major sink manufacturer, states the same thing directly: fasten their undermount sinks only to a solid-surface countertop.
If your kitchen currently has laminate counters, a drop-in sink is the appropriate choice. The exception is when you’re also replacing the countertop as part of the project. If you’re still deciding which sink to buy for your countertop material, our guide to choosing a kitchen sink covers that decision in more depth. Read it before you get to the installation steps below.
Tools and Materials to Install an Undermount Kitchen Sink
- Undermount sink and matching cutout template
- Sink mounting clips or brackets (often included with the sink)
- Two-part epoxy adhesive rated for your countertop material
- 100% silicone sealant (kitchen and bath grade)
- Denatured alcohol, for cleaning bonding surfaces
- Caulk gun
- Jigsaw or circular saw (only if cutting a new opening)
- A helper, plus temporary bracing (wood strips, clamps, or a strap) to support the sink while adhesive cures
- Safety glasses and gloves
Choosing a Reveal Style for Your Undermount Sink Installation
Reveal style refers to how the sink rim relates to the countertop edge once you’ve installed everything. It’s worth deciding before you cut anything.
- Positive reveal: A small portion of the sink’s rim is visible above the countertop cutout.
- Zero reveal: The countertop edge sits flush with the sink wall, with no visible lip in either direction.
- Negative reveal: The countertop extends slightly past the sink wall, covering the rim entirely.
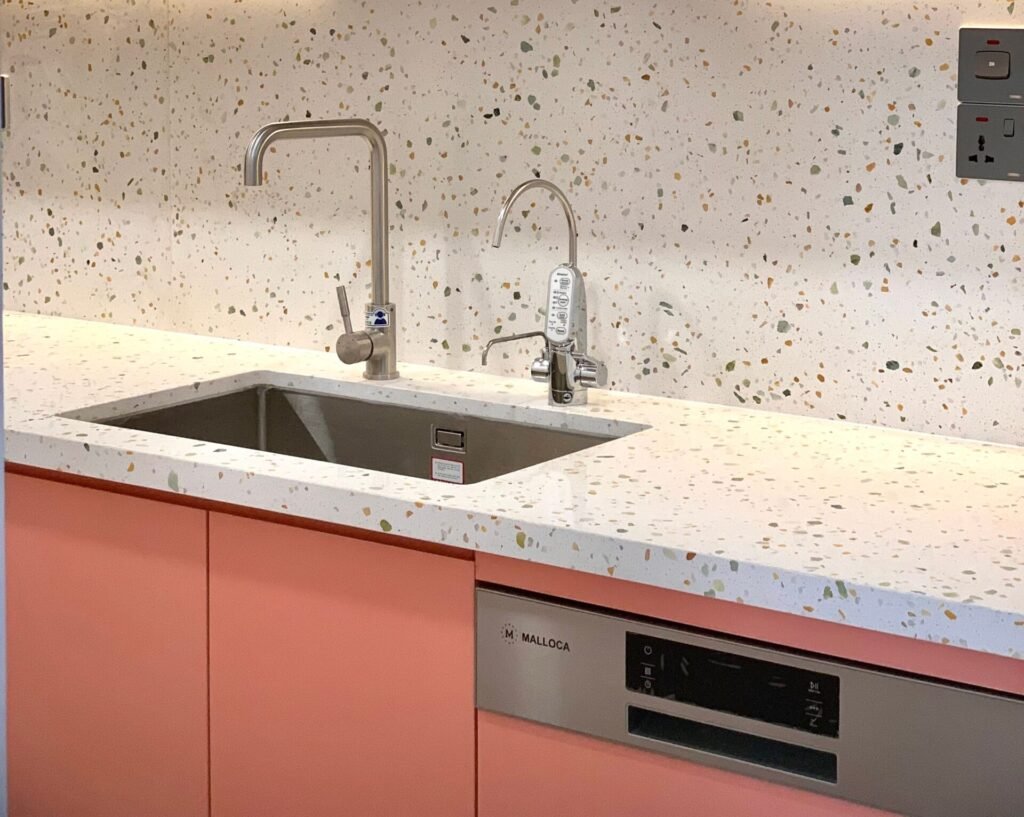
Zero reveal is the most popular choice for kitchens, since it leaves no ledge for food or grime to collect in. It also gives the cleanest, most seamless look. Your sink’s manufacturer template usually specifies which reveal style it uses, so check that before cutting. Still shopping and want to compare specific models? Our roundup of the best undermount kitchen sinks is worth a look before you commit to one.
How to Install Undermount Kitchen Sink: Step-by-Step
1. Confirm the cutout location and size
If you’re replacing an existing sink, measure the current cutout against your new sink’s template to see if it needs adjustments. For a new installation, trace the manufacturer’s template onto the countertop, accounting for your chosen reveal style. Our guide on measuring a kitchen sink covers this step in more detail if you’re working from an existing cutout.
2. Cut the countertop opening
For stone or engineered countertops, leave this step to a countertop fabricator with the right tools. Cutting these materials without chipping or cracking them requires specialized equipment most homeowners don’t have. If you’re working with a material you can cut yourself, wear safety glasses and use the appropriate saw for the material.
3. Clean the bonding surfaces
Wipe the underside of the countertop around the cutout, and the top rim of the sink, with denatured alcohol. Both surfaces need to be completely free of dust and residue for the epoxy and silicone to bond properly.
4. Position the mounting clips
Lay out your sink clips evenly around the perimeter of the cutout, typically spaced 8 to 12 inches apart depending on the sink’s size and shape. Larger or heavier sinks, including cast iron and fireclay models, need more anchor points.
5. Apply epoxy and set the clips
Apply epoxy to the clip locations as directed by your clip manufacturer, then press the clips into place so the epoxy makes full contact. Let this cure according to the epoxy’s instructions before moving forward.

6. Apply silicone sealant to the sink rim
Run a generous, continuous bead of 100% silicone sealant around the top edge of the sink. This bead creates the actual watertight seal between the sink and the countertop, so don’t skimp here. But avoid applying so much that excess squeezes out everywhere once you press the sink into place.
7. Lift the sink into position
With a helper, raise the sink up into the cutout from below, aligning it carefully with the opening. This step is exactly where a temporary support brace earns its keep (more on that below). Holding a sink in place by hand while it seats and cures isn’t realistic for most installs.
8. Secure the clips and check alignment
Tighten the mounting clips evenly around the sink, checking that it stays centered and level as you go. Wipe away any excess silicone with a damp cloth before it sets.
9. Let everything cure fully
Leave the sink undisturbed and dry for at least 24 hours before running water or placing any weight in it, even if the silicone looks dry sooner. The bond needs the full cure time to reach its actual strength.
10. Connect plumbing and accessories
Once cured, install the faucet, drain assembly, and any water supply lines. If your setup also includes a garbage disposal and dishwasher drain line, check our guide to plumbing a kitchen sink with a disposal and dishwasher. It covers those connections in detail. Test for leaks by running water and checking underneath before considering the job finished.
Supporting the Sink During Undermount Sink Installation
An undermount sink genuinely cannot support its own weight until the epoxy and silicone have set. That’s why professional installers routinely brace it during the curing period. A common method involves running a wood board across the countertop opening. Then use clamps, or even a heavy-duty strap or zip tie, to pull the sink upward and hold it snugly against the countertop while everything sets. It looks improvised the first time you see it, but it’s a completely standard technique, not a workaround. Skipping this step, and hoping gravity and adhesive alone will hold a full sink in place overnight, is risky. It’s one of the more common ways a DIY undermount installation fails.
How Long Does It Take to Install an Undermount Kitchen Sink?
An experienced installer can complete the full undermount kitchen sink installation process in under an hour, once someone has already cut the countertop. For a first-time DIYer, plan for 2 to 4 hours of active work, plus the required 24-hour cure time before the sink is usable. Don’t rush the process to hit a specific time target. Installing it correctly and safely matters far more than speed, especially since a rushed epoxy or silicone application is difficult to fix after the fact.
DIY vs. Hiring a Professional for Undermount Kitchen Sink Installation
Cutting a stone or engineered countertop is genuinely not a reasonable DIY task for most homeowners. Leave that part to a fabricator, regardless of how comfortable you are with the rest of the project. If a fabricator has already finished the cutout, or you’re confident cutting the material yourself, the clip-and-seal process is achievable. A patient DIYer with a helper can manage it. Heavy sinks, like cast iron or large fireclay models, and non-rectangular shapes add enough difficulty. Hiring a professional is worth considering, even for otherwise capable DIYers.
Common Mistakes to Avoid When You Install an Undermount Kitchen Sink
- Installing on laminate without reinforcement. Standard laminate countertops can’t support undermount sinks; confirm your countertop material before buying a sink.
- Skimping on cure time. Using the sink before the full 24-hour cure can break the seal before it fully sets.
- Not cleaning bonding surfaces thoroughly. Dust or residue on the countertop or sink rim weakens the epoxy and silicone bond significantly.
- Too few mounting clips. Larger or heavier sinks need more anchor points than a small single-bowl sink; don’t assume one clip spacing fits every sink.
- Skipping the support brace. Trying to hold a sink in place by hand, or relying on adhesive alone during curing, is risky. It commonly causes a sink to drop or shift out of alignment.
Frequently Asked Questions
Can I install an undermount sink myself, or do I need a plumber?
Many DIYers can handle the mounting and sealing steps of an undermount kitchen sink installation themselves, especially with a pre-cut countertop. Cutting the countertop opening in stone or engineered materials is the part best left to a professional fabricator.
What’s the difference between epoxy sink clips and screw-in clips?
Epoxy clips bond to the countertop with adhesive and are the standard choice for stone and quartz, since they avoid drilling into the material. Screw-in clips work for wood or plywood-backed countertops where drilling is straightforward.
How do I know if my countertop can support an undermount sink?
Solid-surface materials like granite, quartz, marble, concrete, and Corian-style solid surface all work. Standard laminate and most tile-over-particleboard counters do not, due to moisture exposure at the exposed cutout edge.
Can I use plumber’s putty instead of silicone to seal an undermount sink?
No, silicone is the standard choice for the rim seal on undermount sinks. Manufacturers typically reserve plumber’s putty for metal drain assemblies, unless yours specifies otherwise.
Is it normal for the sink to feel slightly loose right after installation?
Some minor give is normal before the epoxy and silicone fully cure. If it still feels loose or shifts noticeably after the full 24-hour cure time, check the clips. Make sure they’re properly tight and the epoxy has bonded correctly.
Final Thoughts on Undermount Kitchen Sink Installation
Understand how to install undermount kitchen sink correctly, and the process becomes genuinely manageable. That means confirming your countertop material and properly supporting the sink while adhesives cure. It just takes a patient DIYer with the right tools and a helper. Cutting stone or engineered countertops is worth leaving to a professional, but the mounting and sealing steps are well within reach otherwise. Get those fundamentals right, and an undermount sink installation should hold up for years without issue.

Hey, My name is MAMON. I am a SEO content creator and affiliate marketer with over 8 years of experience. I create honest product reviews, in-depth buying guides, and practical how-to articles to help readers make informed decisions. My mission is to provide trustworthy, research-backed content that delivers real value.
Leave a Reply