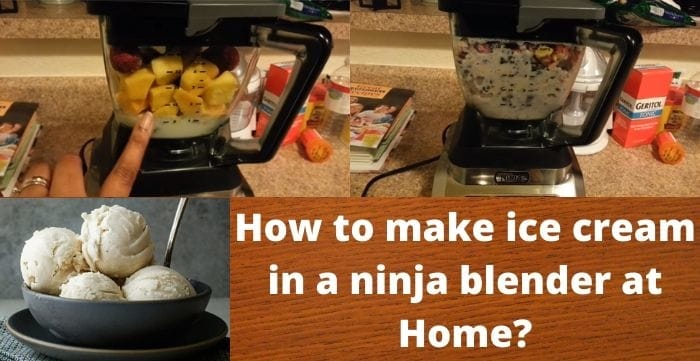
Ninja blenders are powerful enough to handle far more than smoothies, and one of the most satisfying tricks they can pull off is homemade ice cream. Knowing how to make ice cream in a Ninja blender means you can go from a bag of ice and a few pantry staples to a bowl of creamy soft-serve in about five minutes, no ice cream maker required. This guide covers the full method, the science behind why it works, and how to troubleshoot the results if your first batch doesn’t come out quite right.
Key Takeaways
- A standard Ninja blender makes soft-serve style ice cream in minutes; a Ninja Creami is a separate, dedicated machine that spins pre-frozen pints into a firmer, scoopable texture.
- Crushing the ice thoroughly before adding other ingredients is the single biggest factor in avoiding a grainy or icy texture.
- Blender ice cream is naturally softer than churned ice cream because it incorporates less air; freezing it briefly after blending firms it up.
- Adding ingredients gradually, rather than all at once, prevents the blender from jamming on a thick, semi-frozen mixture.
Ninja Blender vs. Ninja Creami: What’s the Difference?
It’s worth clearing this up before you start, since the two methods and machines get mixed up constantly online. A standard Ninja blender makes ice cream by crushing ice and blending it with liquid ingredients in real time, producing a soft-serve consistency you can eat immediately or firm up briefly in the freezer. A Ninja Creami is a completely different, purpose-built machine that spins a pre-frozen base (frozen solid for 24 hours in its own container) to create a denser, scoopable texture closer to store-bought ice cream. If a recipe calls for freezing a mixture for a full day before “spinning” it, that’s a Creami recipe, not a standard blender one. This guide covers the blender method specifically, which is faster and doesn’t require any extra equipment.
Ingredients You’ll Need
- 2 cups of ice cubes
- 1/4 cup of milk
- 4 tablespoons of granulated sugar
- 1 tablespoon of vanilla extract
- Nonfat dry milk powder (optional, for a thicker, creamier texture)
This base recipe makes roughly two servings and works as a starting point for whatever flavor variations you want to try.
How to Make Ice Cream in a Ninja Blender: Step-by-Step
1. Crush the ice
Add the ice cubes to the pitcher and select your blender’s ice crush setting, or pulse on high until the ice turns to a fine, snow-like consistency. This usually takes less than a minute on most Ninja models. Thoroughly crushed ice is the foundation of a smooth result, so don’t rush this step or move on while chunks remain.
2. Add the remaining ingredients
With the ice fully crushed, add the milk, sugar, and vanilla extract. Secure the lid before blending to keep the mixture from spilling out as it moves. Blend on high for about a minute, or until the mixture reaches a smooth, uniform consistency with no visible ice clumps.
3. Adjust the texture
If the mixture looks thin or soupy, add nonfat dry milk powder two tablespoons at a time until it thickens to a creamy consistency. If it looks too thick to blend smoothly or the motor sounds strained, add a splash more milk to loosen it up.
4. Transfer to the freezer
Pour the mixture into a shallow, lidded container with a wide surface area, which exposes more of the mixture to cold air and speeds up firming. Freeze for 2 to 3 hours. Taste-test before serving: if it’s still too soft, give it another 30 minutes; if it’s frozen too hard, let it sit at room temperature for about 10 minutes to soften.
5. Serve and top
Scoop into bowls and add your favorite toppings: sliced bananas, fresh berries, chocolate syrup, or granola all work well against the vanilla base.
Why Blender Ice Cream Turns Out Softer Than Churned Ice Cream
If you’re expecting a texture exactly like a pint from the store, it helps to understand why blender ice cream behaves differently. America’s Test Kitchen’s explanation of no-churn blender ice cream notes that traditional ice cream makers churn the mixture as it freezes, which does two things at once: it incorporates air into the mix and breaks up ice crystals as they form, both of which create that light, scoopable texture. A blender does some of this work by crushing ice and mixing air into the base, but without the slow, simultaneous churn-and-freeze process, the result naturally comes out softer and closer to soft-serve than a dense, churned pint. That’s not a flaw in the method, it’s just a different texture, and it’s part of why blender ice cream is best enjoyed fairly soon after making it rather than stored frozen solid for weeks.
Ninja’s Official Vanilla Ice Cream Recipe
Ninja’s own test kitchen recipe takes a slightly different approach, using whole milk mixed with instant vanilla pudding mix as the base rather than crushed ice and dry milk powder. It’s worth trying as an alternative if you want an even creamier result, and it’s designed the same way ours is: as a base you can customize with mix-ins pulsed in at the end once the ice cream itself is prepared.
Flavor Variations to Try
- Chocolate: Add 2 tablespoons of cocoa powder along with the sugar and vanilla.
- Strawberry: Blend in a handful of frozen strawberries in place of some of the ice.
- Banana: Swap in a frozen, sliced banana for a naturally sweet, creamier result.
- Coffee: Add a teaspoon of instant espresso powder for a mocha-style twist.
Fresh fruit adds more moisture than ice alone, so if you’re using fruit, blend a bit longer, closer to two minutes, to fully break it down and reach the right thickness. If you enjoy experimenting with fruit-based blends, our guide to making grape juice with a blender covers similar techniques for working with fresh produce in a high-powered blender.
Making It Healthier
The base recipe here is already fairly light, but there’s room to adjust it further depending on what you’re looking for. Swapping whole milk for a lower-fat or unsweetened milk cuts calories without changing the basic method, and reducing the sugar by half still produces a reasonably sweet result once you factor in any fruit or mix-ins added at the end.
Food Safety Tips for Homemade Ice Cream
Since this recipe uses dairy and doesn’t involve any cooking or pasteurization step, a few basic food safety habits are worth keeping in mind. Use milk that’s been properly refrigerated and hasn’t sat out, and don’t leave the finished mixture at room temperature for more than about two hours before freezing or serving it, the same general guideline that applies to any dairy-based food. If you’re making a version with raw eggs for a richer custard-style base rather than the simple recipe here, use pasteurized eggs to reduce any risk. None of this is unique to blender ice cream specifically, but it’s worth keeping in mind any time dairy sits out during prep.
Troubleshooting Common Problems
- The mixture is grainy or icy. This almost always traces back to underdeveloped ice crushing. Blend the base longer, or crush the ice more thoroughly before adding the liquid ingredients.
- The blender jams or stalls. Add ingredients gradually rather than all at once, and don’t overfill the pitcher with a thick, semi-frozen mixture. If it stalls, stop, add a splash of milk, and pulse a few times to loosen things up before continuing.
- The ice cream never firms up in the freezer. Too much liquid relative to ice or dry milk powder is the usual cause. Add more dry milk powder next time, or reduce the milk slightly.
- The texture is too hard after freezing. This is normal after a few hours in a standard freezer. Let it sit at room temperature for 10 minutes before serving to soften it back up.
Blending Tips
- Don’t open the lid mid-blend. This can let the mixture spill out and interferes with proper mixing.
- Add ingredients gradually rather than dumping everything in at once, which reduces the risk of jamming a powerful motor on a dense mixture.
- Stick to the listed measurements the first time you try a recipe. Ratios matter more than they might seem to for getting a smooth, scoopable result.
- Clean your Ninja blender thoroughly with soap and hot water right after use, since dairy residue left in the pitcher hardens quickly and gets harder to remove the longer it sits.
Frequently Asked Questions
Can I use a regular Ninja blender if I don’t have a Ninja Creami?
Yes. The blender method described here doesn’t require a Creami at all, and produces a soft-serve style result in a fraction of the time a Creami recipe needs.
Why does my blender ice cream melt so fast?
Blender ice cream has less air incorporated than churned ice cream, and typically less fat too, depending on your recipe, both of which make it melt faster than a store-bought pint. Serving it slightly firmer, straight from a short freeze, helps.
Can I make this dairy-free?
Yes. Substitute the milk with a dairy-free alternative like oat or almond milk, and skip or substitute the dry milk powder with a plant-based thickener if you want extra creaminess.
How long does homemade blender ice cream keep in the freezer?
It’s best within a day or two, since without stabilizers, it tends to develop larger ice crystals and a harder, icier texture the longer it sits frozen.
Can I add mix-ins like chocolate chips or nuts?
Yes, but add them at the very end with a few short pulses rather than blending them in fully, so they stay in distinct pieces instead of getting pulverized into the base.
Do I need a high-powered Ninja model, or will any Ninja blender work?
Most Ninja blenders, including standard and Auto-iQ models, have enough power to crush ice and produce a smooth result. Higher-wattage models tend to crush ice faster and more finely, which can shave a bit of time off the process, but it’s not a strict requirement.
Final Thoughts
Making ice cream in a Ninja blender is one of the fastest ways to satisfy a craving without special equipment: crush the ice thoroughly, blend in the remaining ingredients, adjust for thickness, and give it a short freeze if you want a firmer scoop. It won’t taste identical to a churned or Creami-spun batch, but the soft-serve texture and five-minute turnaround make it a genuinely useful trick to have on hand, especially once you start experimenting with flavors.

Hey, My name is MAMON. I am a SEO content creator and affiliate marketer with over 8 years of experience. I create honest product reviews, in-depth buying guides, and practical how-to articles to help readers make informed decisions. My mission is to provide trustworthy, research-backed content that delivers real value.
Leave a Reply