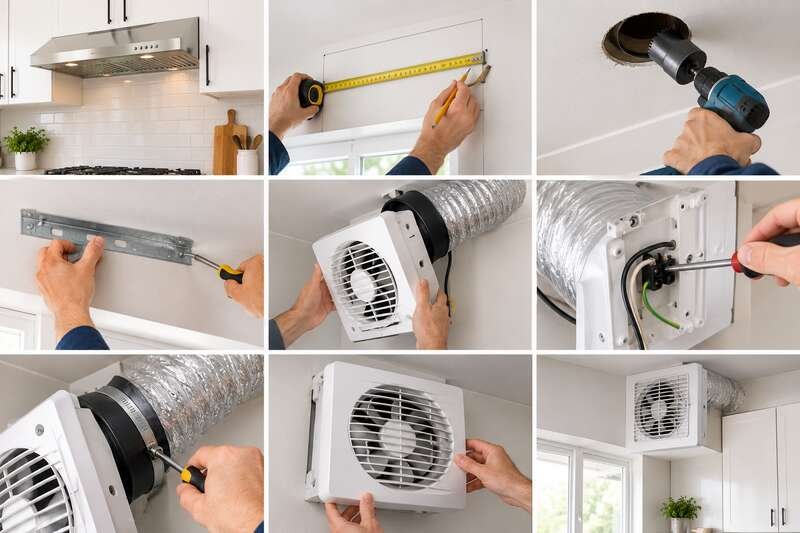
Installing a kitchen exhaust fan is a full afternoon project for most DIYers. If you’re learning how to install an exhaust fan in the kitchen, the process breaks down into a few clear stages. Choose a spot directly above the cooking surface, mount the fan, run a dedicated electrical circuit, connect the ductwork to an exterior wall, then test everything before closing up the wall. Gas ranges make this even more worth doing right. Gas cooking releases pollutants that only a properly vented fan actually removes from the kitchen.
Key Takeaways
- Proper kitchen ventilation cuts fire risk and clears the pollutants gas cooking releases indoors.
- Fan placement directly above the cooking surface, with ducted models near an exterior wall, matters more than any other installation choice.
- Many range hoods need their own dedicated circuit, separate from the kitchen’s small-appliance circuits, especially microwave-hood combos and high-CFM models.
- UCLA Fielding School of Public Health research found fewer than 35% of California households with gas stoves regularly use a range hood. That’s despite peak indoor pollutant levels exceeding outdoor air-quality standards after just an hour of gas cooking.
- Test the fan before closing up walls or cabinetry. It’s far cheaper to fix a wiring or duct issue at this stage than after the drywall goes back up.
Why Kitchen Ventilation Is Worth the Install Time
A kitchen exhaust fan pulls smoke, odors, and airborne moisture out of the cooking area instead of letting them settle on cabinets and walls. That matters for comfort. However, there’s also a real air-quality case for installing one. UCLA Fielding School of Public Health research looked at what happens after an hour of cooking on a gas stove. Peak indoor nitrogen dioxide levels exceeded state and national outdoor air-quality standards in more than 90% of modeled scenarios. Yet fewer than 35% of California households with gas stoves regularly run a range hood while cooking. A fan that’s properly sized and actually vents outdoors is the single most effective fix.
Tools and Materials You’ll Need
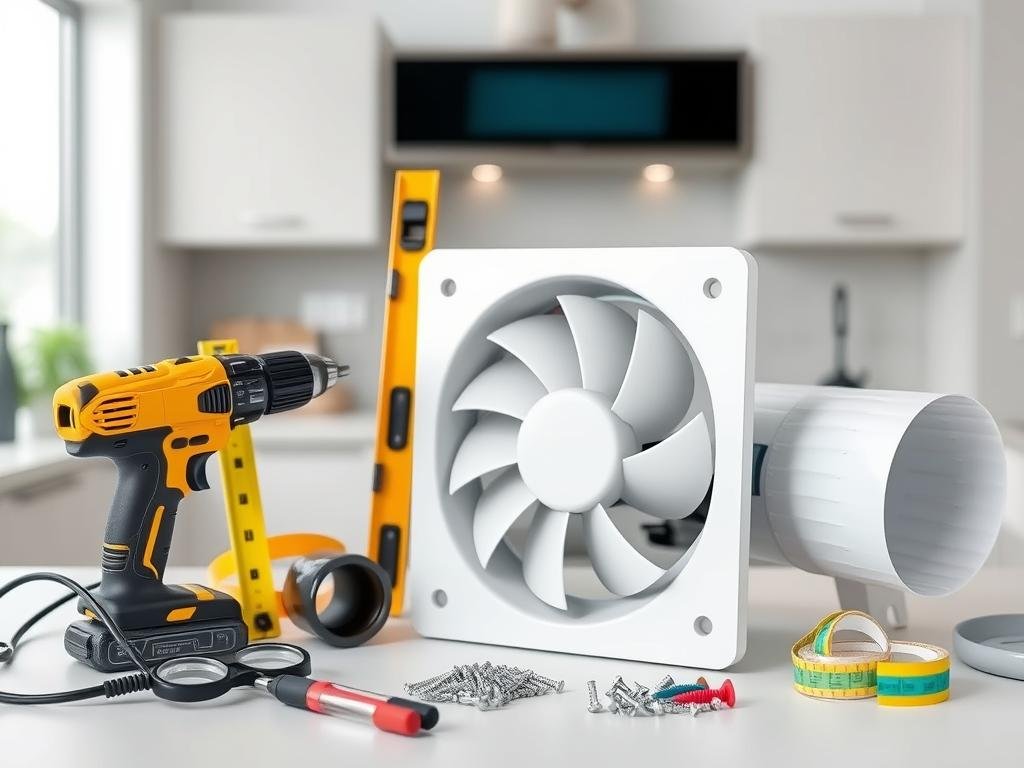
Tools:
- Drill and screwdriver
- Measuring tape and pencil
- Stud finder
- Wall anchors and screws
- Duct tape (foil-backed, not standard cloth duct tape, for sealing joints)
- Safety goggles and gloves
- Wire strippers and a non-contact voltage tester
- Reciprocating saw or drywall saw, and a jigsaw for exterior siding
Materials:
- Exhaust fan or range hood (ducted or ductless)
- Ductwork sized to the fan’s outlet (for ducted models)
- Mounting brackets (usually included with the unit)
- Vent cap and exterior vent cover
- Caulk rated for exterior use
Check Local Permit Requirements First
Before you cut into a wall, check with your local building department. Many jurisdictions require a permit for new electrical circuits or for cutting a new penetration through an exterior wall or roof. This applies even for a relatively small project like this one. Rules vary a lot by city and county. A quick call or website check before you start can save you from having to redo work later during a home sale inspection. If you rent or live under an HOA, confirm exterior vent cap placement is allowed before you cut anything.
How to Install Exhaust Fan in Kitchen: Choosing the Location
Getting the location right matters more than any other step in how to install exhaust fan in kitchen projects. The fan needs to sit directly above the range, stovetop, or cooktop to actually capture what it’s designed to capture.
Centered Over the Cooking Surface
Position the fan or hood centered above the burners. Standard models mount 18 to 24 inches above the cooktop, while higher-capacity hoods mount 24 to 30 inches above it. Off-center placement leaves one side of the cooking surface essentially unvented.
Exterior Wall Access for Ducted Models
If you’re installing a ducted fan, plan the location carefully. Pick the shortest, straightest path to an exterior wall or the roof. Every additional bend in the ductwork reduces airflow. As a result, a fan mounted on an interior wall far from any exterior access will underperform, even if it’s rated for plenty of CFM. For general guidance on matching a fan’s CFM to your kitchen size, see our post on whether gas ranges need to be vented.

Preparing the Kitchen Area
Before cutting into any wall or cabinet, shut off power to the work area at the breaker panel and confirm it’s off with a non-contact voltage tester. Clear the cabinet or wall space where the fan will mount. If you’re replacing an existing hood, disconnect and remove it fully, including its old ductwork, before starting the new install.
Cutting the Vent Opening
For a ducted installation, mark the vent opening using the diameter specified in your fan’s manual. A typical size is 3.25 x 10 inches for a rectangular duct. Round ducting instead uses a matching circle. Double-check the mark against the actual duct collar before cutting anything. A hole cut even slightly undersized means fighting the ductwork into place later. A hole cut too large, on the other hand, leaves gaps that are hard to seal properly.
First, use a stud finder to confirm you’re not cutting through a stud or, on an exterior wall, a structural member you’d need to work around. Then cut the interior opening with a drywall saw, and work outward to the exterior sheathing and siding with a reciprocating saw or jigsaw. Go slowly near the outer wall to avoid tearing siding material. Keep the cut as clean and true to your marked line as you can, since the exterior vent cap needs a snug fit to seal properly.
How to Install Exhaust Fan in Kitchen: Mounting the Unit
Attaching Mounting Brackets
Locate wall studs with a stud finder and mark bracket positions accordingly. Mounting into studs, not just drywall, is what keeps a hood or fan secure over years of vibration and weight from filters. Attach the brackets per the manufacturer’s template, which is usually included in the box.
Positioning and Securing the Fan
With a helper, lift the fan or hood into the brackets. Secure it with the screws specified in the installation manual. Confirm it’s level before fully tightening every screw, since an unlevel hood will look off and can strain the mounting points over time.
Electrical Wiring Connections
Most residential range hoods run on a standard 120V circuit. However, many manufacturers specify a dedicated circuit separate from the kitchen’s small-appliance circuits. This especially applies to microwave-hood combo units or high-CFM models, since those circuits weren’t designed to carry the additional load. If the receptacle serving the hood sits within 6 feet of a sink, NEC 210.8(A)(7) requires GFCI protection on that circuit. A hardwired connection to a junction box isn’t covered by this same receptacle rule, but GFCI protection is still good practice near a water source.
Connect the fan’s wiring according to the included wiring diagram. This typically means matching black-to-black (hot), white-to-white (neutral), and green or bare copper to ground. If you’re not confident reading a wiring diagram or working inside a breaker panel, this is the point to bring in a licensed electrician rather than guess. Miswired connections are a fire risk, not just an inconvenience.
Connecting the Ductwork
For ducted installations, connect the fan’s exhaust outlet to the ductwork using foil-backed duct tape or clamps rated for HVAC use. Skip standard cloth-backed duct tape, since it degrades over time and doesn’t hold a seal. Next, run the duct by the shortest practical path to the exterior wall or roof cap. Seal every joint along the way to prevent grease-laden air from leaking into the wall cavity. Install the exterior vent cap last, caulking around its edges to keep out moisture and pests. If your layout sends the duct through the roof instead of a side wall, check our guide on venting a range hood through a roof. It covers the flashing and weatherproofing details specific to that path.
Ductless models skip this step entirely and instead route air through a charcoal filter back into the kitchen. If you’re deciding between ducted and ductless, our guide to the difference between duct and ductless range hoods covers the tradeoffs in more depth. Our guide to choosing a gas range covers CFM and venting basics that apply to hood selection too.
Testing and Troubleshooting
First, restore power at the breaker and run the fan on each speed setting, checking for unusual noise, vibration, or a burning smell. Any of those means stop and recheck the wiring. Next, hold a piece of tissue paper near the exterior vent cap while the fan runs on high. It should visibly move if the duct run is properly sealed and unobstructed.
Common issues:
- Weak airflow at the vent cap: usually a duct run that’s too long, has too many bends, or has a loose joint leaking air before it reaches the cap.
- Fan runs but trips the breaker: points to an undersized circuit or a wiring fault; call an electrician rather than resetting the breaker repeatedly.
- Rattling or vibration: often a loose mounting screw or a fan blade that’s not properly seated; recheck the mounting bracket connections.
- Vent cap flap won’t open fully: usually weak airflow reaching the cap rather than a broken flap. Trace back through the duct run for kinks or blockages before assuming the cap itself is defective.
Once your kitchen exhaust fan is up and running, keep it working well with regular cleaning. Our guide on how to clean a kitchen exhaust fan like a professional covers the filter and blade maintenance that keeps airflow strong for years. If you’re mounting a new hood under existing cabinetry rather than starting from scratch, check our under-cabinet range hood installation guide. It covers the clearance and mounting specifics for that setup.
Video: Installing a Kitchen Exhaust Fan
FAQ
Do I need a licensed electrician to install a kitchen exhaust fan? Not always. If you’re comfortable working safely inside a breaker panel and reading a wiring diagram, a straightforward swap can be a DIY job. Bring in an electrician for a new dedicated circuit, any GFCI requirement near a sink, or anything you’re not fully confident about.
How high above the stove should a kitchen exhaust fan be installed? Standard-capacity hoods mount 18 to 24 inches above the cooktop; higher-CFM hoods are typically installed 24 to 30 inches above it. Check your specific model’s manual, since spacing varies by manufacturer.
Does a range hood need its own electrical circuit? Many do, especially microwave-hood combo units and high-CFM models, and it generally shouldn’t share the kitchen’s small-appliance circuits. Check your manufacturer’s installation instructions for the specific requirement, since this varies by unit and local code.
Can I install a ductless exhaust fan instead of running ductwork? Yes. Ductless models filter air through a charcoal filter and recirculate it into the kitchen instead of venting outside. They’re easier to install but generally less effective at removing pollutants and moisture than a properly ducted fan.
Do I need a permit to install a kitchen exhaust fan? It depends on your location and the scope of the work. A straight swap of an existing hood for a similar model on the same circuit often doesn’t require one. Adding a new dedicated circuit or a new wall or roof penetration often does. Check with your local building department before starting.
What’s the most common mistake in a kitchen exhaust fan installation? Off-center placement or a duct run with too many bends. Both quietly cut the fan’s effective performance even when the unit itself is rated for plenty of airflow.
Conclusion
Knowing how to install exhaust fan in kitchen setups comes down to getting four things right. That means centered placement above the cooking surface, secure mounting into wall studs, correctly wired and protected electrical connections, and a short, sealed duct run to the outside. Test everything before closing up the wall, and the fan will do its job quietly for years.

Hey, My name is MAMON. I am a SEO content creator and affiliate marketer with over 8 years of experience. I create honest product reviews, in-depth buying guides, and practical how-to articles to help readers make informed decisions. My mission is to provide trustworthy, research-backed content that delivers real value.
Leave a Reply