When water is scarce in winter, snow can look like an easy backup source. It isn’t safe straight from the ground, though. This guide covers how to filter snow water properly: the real risks, the methods that work, and a step-by-step process for turning snow into water you can actually drink.
Key Takeaways
- Unfiltered snow can carry bacteria, parasites, and pollutants that pose real health risks.
- Boiling for at least one minute (three minutes above 5,000 feet) is the most reliable way to kill pathogens, per EPA guidance.
- A layered filter of cotton, sand, and stones removes debris and sediment before you disinfect.
- Proper storage in clean, food-grade containers keeps filtered water safe for months.
- Avoiding common mistakes, like skipping disinfection or collecting snow near roads, makes the whole process far safer.
Understanding Snow Water Safety and Risks
Fresh snow looks clean, but looks are deceiving. It can carry contamination and waterborne pathogens you can’t see. Drinking it without filtering and disinfecting is a real risk, especially far from medical help.
Health Concerns with Unfiltered Snow
Drinking unfiltered snow can cause stomach illness and parasitic infection. It can also raise your hypothermia risk. Melting snow in your mouth or stomach costs your body energy and heat it can’t spare in cold conditions.
Common Contaminants in Snow
- Bacteria and parasites, including E. coli, Giardia, and Cryptosporidium, can cause serious gastrointestinal illness.
- Environmental pollutants, like heavy metals and airborne chemicals, can settle into snow as it falls.
- Animal waste and decaying organic matter can introduce additional pathogens, especially near trails or campsites.
Effects on Body Temperature
Eating or drinking unfiltered snow lowers your core temperature quickly. Your body has to spend energy warming and melting it internally. In a cold-weather survival situation, that energy loss can matter as much as the contamination risk.
Knowing these risks before you head into snowy terrain is crucial. Learning how to filter snow water properly protects you from waterborne pathogens, without needlessly cooling your body down or wasting energy you’ll need to stay warm. The same core principles apply to how to purify well water at a cabin with no municipal supply.

Essential Materials for Snow Water Filtration
Having the right tools on hand makes the difference between a quick, safe process and a risky improvised one. Here’s what to pack or gather:
- Pot for boiling water
- Fire source (matches, lighter, or flint and steel)
- Water purification tablets (iodine or chlorine-based)
- Water bottles or containers
- Plastic bags
- Sand (preferably fine-grained)
- Cotton fabric or filters
- Small, medium, and large-sized stones
- An empty bottle or container for collecting filtered water
- Charcoal (optional, for absorbing chemicals and odors)
A multi-step process works best: physical filtering to remove debris, then boiling or chemical treatment to kill pathogens. Skipping either step leaves you exposed to a risk the other step doesn’t cover.
| Material | Purpose |
|---|---|
| Pot and fire source | Boiling water to kill bacteria and parasites |
| Purification tablets | Chemically treating water when boiling isn’t practical |
| Bottles and containers | Storing and transporting filtered water |
| Sand, stones, and cotton | Physically filtering out debris and particulates |
| Charcoal (optional) | Absorbing residual chemicals or odors |
With these items on hand, you can filter and disinfect snow water reliably. That gives you a genuine backup water source in a survival or off-grid situation.
Natural vs Chemical Filtration Methods
There’s more than one way to purify snow water, and each fits a different situation. Boiling is the most reliable: a rolling boil for at least one minute kills essentially all disease-causing organisms, per the EPA’s emergency disinfection guidance. Above 5,000 feet, boil for three minutes instead, since water boils at a lower temperature at altitude. Purification tablets are a lighter, no-fire option using iodine or chlorine.
Natural Filtering Materials
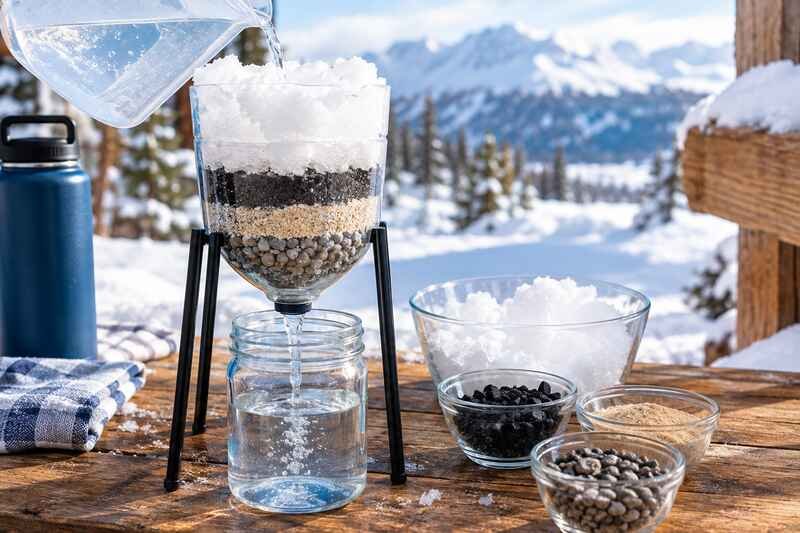
For a physical filter, everyday outdoor materials work surprisingly well. Sand, stones, and cotton remove sediment and debris from melted snow before you disinfect it. Layering them inside a bottle creates a simple, effective filter.
- Sand: Its fine grains trap larger particles, making it a good first layer.
- Stones: They filter out smaller particles and sediment.
- Cotton: Its fibers act as a barrier against larger debris and some microorganisms.
- Charcoal: It absorbs chemicals and improves taste and odor.
Pack the layers tightly. Loose layers let water and debris slip past instead of filtering through.
| Filtration Method | Advantages | Limitations |
|---|---|---|
| Boiling | Kills essentially all bacteria, viruses, and parasites | Requires a heat source and fuel; takes time |
| Purification Tablets | Lightweight and convenient, no heat source needed | Can leave a chemical taste; less effective against some parasite cysts |
| Natural Filters (sand, stones, cotton) | Uses materials you can find outdoors, low cost | Removes sediment and debris but doesn’t reliably kill pathogens on its own |
Each method has real tradeoffs. A physical filter plus boiling or tablets, used together, covers more ground than any one method alone.
How to Filter Snow Water: Step-by-Step Process
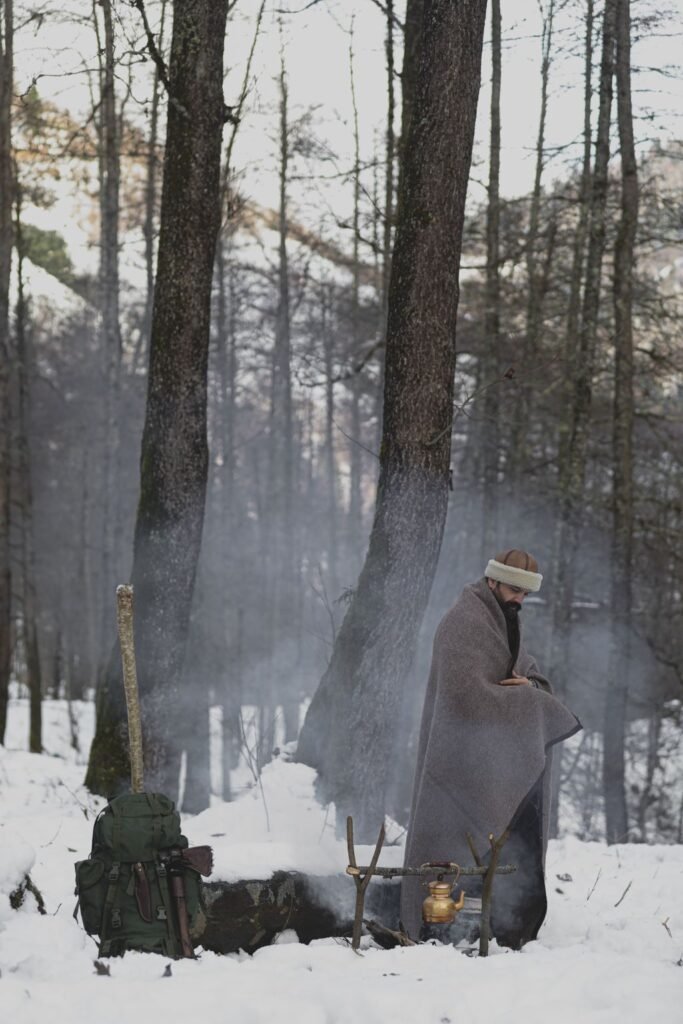
Knowing how to filter snow water can matter a lot more than it sounds, whether you’re on a winter hike or genuinely stranded. Here’s the process from collection to a safe glass of water.
- Collect clean, white snow away from trails, roads, and campsites. Skip anything discolored or visibly dirty.
- If you’re melting snow in a pot, add it gradually rather than packing it in all at once, so the pot doesn’t scorch before there’s liquid water in it.
- Run the melted water through a layered filter: cotton first, then sand, then small stones, then large stones. This step removes debris before disinfection.
- Melt the snow using a fire, a camp stove, or body heat as a last resort. Watch for burns near open flame and for getting chilled while you wait.
- Disinfect the filtered water. Bring it to a rolling boil for at least one minute (three at altitudes above 5,000 feet), or use purification tablets according to the package directions.
- Let boiled water cool before drinking, both to avoid burns and because cold water is easier to drink in volume when you need to rehydrate.
On water needs, Ready.gov recommends at least one gallon per person per day for drinking and basic sanitation. Roughly three-quarters of a gallon of that is for drinking alone under normal conditions. Cold weather, exertion, and altitude all push your actual need higher. Don’t ration snowmelt water more aggressively than that if you can help it.
Following this process gives you a reliable way to get safe water, even in tough outdoor conditions. Skipping the disinfection step is the single riskiest shortcut people take.
Building a DIY Snow Water Filter System
A homemade filter is cheap, quick to build, and genuinely useful for pulling debris out of snowmelt before you disinfect it. Here’s how to put one together.
Bottle Preparation
Start with a clean, empty plastic bottle. Rinse it well, then cut off the bottom. You’ll be left with the middle section, which holds your filter layers.
Layer Assembly
- Put a layer of clean cotton at the bottle’s neck end. It catches larger particles first.
- Add a layer of sand, then small to medium stones or gravel on top. These catch finer sediment.
- Finish with a layer of larger stones. This keeps everything packed tight so water flows through evenly instead of channeling around the layers.
Pack each layer firmly. A loosely packed filter lets water bypass the material instead of passing through it.
Maintenance Tips
- Replace the cotton layer often, since it clogs fastest.
- Test the filter with a mix of soil and water before you rely on it, and check that the output runs clear.
- Store the filter somewhere cool and dry between uses so the materials last longer.
A homemade filter like this won’t disinfect water on its own. Pair it with boiling or tablets, and you’ve got a genuinely useful backup water filter for the outdoors or a winter emergency. The same layering logic shows up in DIY home water filtering systems, just built for a permanent setup instead of a single bottle.
Best Practices for Snow Collection
Where and how you collect snow matters as much as how you filter it afterward. Start with fresh, white snow away from trees, buildings, and any visible debris. Skip anything discolored or dirty, since that usually signals contamination. Icicles are a solid alternative to loose snow, since they’re denser and yield more water per volume.
Location matters too. Avoid snow near roads or urban areas, since runoff and exhaust residue can settle into it. Untouched snow in the wilderness or rural areas carries a lower contamination risk than snow near human activity.
- Collect freshly fallen snow away from trees and other likely contamination sources.
- Skip discolored or visibly dirty snow.
- Use icicles when they’re available, since they’re denser and more water-rich than loose snow.
- Stay mindful of nearby pollution sources, like roads or campsites, when choosing where to collect.
Following these snow-collection basics gets you a cleaner starting point. That makes every filtration step afterward more effective, and it lowers the odds you’re fighting contamination the filter can’t fully remove.
Safe Storage of Filtered Snow Water
How you store filtered snow water affects how long it stays safe to drink. A few basics go a long way here.
Container Types
Use clean, food-grade containers made of HDPE plastic, marked with a “2” inside the recycling triangle. Avoid any container that previously held chemicals or cleaning products, since residue can leach into your water.
Skip glass or metal for long-term storage where possible. Glass is fragile in cold conditions, and metal containers can affect taste or support bacterial growth over time.
Storage Duration Guidelines
- Properly sealed, commercially bottled water has no FDA-mandated expiration date. Per the International Bottled Water Association, the FDA has stated there’s no defined shelf-life limit for bottled water stored correctly. Any date on the label is typically for stock rotation, not safety.
- Your own filtered snow water is less controlled than commercial bottling. Treat it more cautiously: good for a few months in a cool, sealed container, but best used within a few days if stored outdoors or somewhere temperatures fluctuate.
- For longer home storage, the EPA’s guidance is 2 drops of plain, unscented liquid bleach (6% or 8.25% concentration) per liter or quart of water, or roughly 8 drops per gallon. Double that if the water looks cloudy or very cold.
Temperature Considerations
Store water somewhere cool and dry, away from direct sunlight and temperature swings. Both heat and light accelerate bacterial growth and can affect taste.
A storage area between roughly 50°F and 70°F keeps water safer and better-tasting for longer. The same range applies to any drinking water you store at home, whether it came from snow, a well, or a municipal line.
By following these storage practices, your filtered snow water stays a genuinely reliable backup source. That matters most exactly when you need it, during an emergency or an interruption to your regular water supply.
Common Mistakes to Avoid When Filtering Snow
A few avoidable mistakes account for most of the risk in filtering snow for drinking water. Watch for these:
- Not boiling long enough. A brief simmer isn’t the same as a full rolling boil for the recommended time.
- Using snow from near roads or urban areas, where pollutants and chemical residue are more likely.
- Skipping filter maintenance. Clogged or worn filter materials lose effectiveness fast.
- Judging safety by appearance alone. Snow that looks clean can still carry microscopic contaminants a physical filter won’t catch.
Staying alert to these mistakes, and not cutting corners on disinfection specifically, keeps you meaningfully safer through the whole process. Getting how to filter snow water right, start to finish, is what actually protects your health, not just the effort of doing something.
Emergency Snow Water Filtration Techniques
In a genuine survival situation, you might not have your usual filter or gear on hand. A few makeshift methods can still help, even if they’re not as reliable as boiling or a proper filter.
One option is using clothing as a rough filter: wrap snow in a clean shirt or bandana to catch large debris before melting it. A solar still is another option, covering a hole in the ground with a plastic sheet to collect condensation, though yield is slow.
Sand, gravel, and charcoal can also form a basic improvised filter when nothing else is available. It won’t remove every contaminant, but it helps. Whenever you can manage it, still boil the water afterward in a metal container or pot over a fire or stove. That step does more to kill pathogens than any improvised filter alone.
Conclusion
Snow can be a genuine emergency water source when you treat it that way: filter out the debris, then disinfect with a full rolling boil or purification tablets. Skipping either step is where most of the real risk comes from, not the snow itself.
Keep the basics in mind: clean snow away from roads and trails, a simple filter, a full boil (three minutes above 5,000 feet), and clean, food-grade storage. If you’ll need this skill often, a gravity-fed filter like the Big Berkey is worth having as a more convenient backup alongside these manual techniques.

Hey, My name is MAMON. I am a SEO content creator and affiliate marketer with over 8 years of experience. I create honest product reviews, in-depth buying guides, and practical how-to articles to help readers make informed decisions. My mission is to provide trustworthy, research-backed content that delivers real value.
Leave a Reply