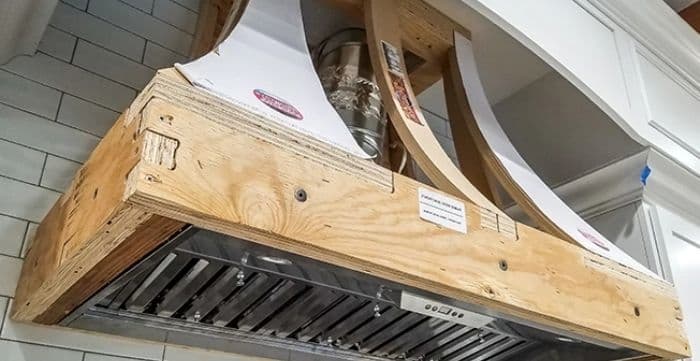
A plain metal or ductless insert range hood rarely matches the rest of a kitchen. Building a custom range hood cover fixes that: you frame a simple box around your existing hood insert, skin it in plywood or wood siding, and paint or stain it to match your cabinets. Most homeowners finish the project in a weekend for well under $200 in materials.
Key Takeaways
- A custom range hood cover is a frame-and-skin box built around your existing range hood insert, not a replacement for the hood itself.
- Homeowner build logs commonly land the total cost between $40 and $200 in materials, depending on whether you use plywood, pine, or hardwood.
- Vertical clearance above the cooktop matters before you build: the International Residential Code sets a baseline of 30 inches to combustible material, reduced to 24 inches with specific protection in place, and some states set their own 24-inch minimum.
- If your hood is ducted, keep at least 18 inches of clearance between the ductwork and any combustible framing, per NFPA 96, unless you use a listed reduced-clearance duct assembly.
- The most common failure points are skipping the code check and rushing the finish work: caulking, filler, and primer are what make a DIY cover look custom instead of homemade.
What Is a Custom Range Hood Cover, and Why Build One?
A range hood cover, sometimes called a hood chase or hood surround, is a wood enclosure built around a range hood insert, which is the motor, fan, and light unit that actually does the venting. The insert stays hidden inside the cover, so from the kitchen you only see the finished wood shape, not the bare metal box.
Building your own pays off in three ways. First, it’s a design upgrade: a wood or painted cover can echo your cabinetry, add a farmhouse or transitional look, or become a genuine focal point over the range. Second, it protects the insert itself. A boxed-in modern range hood collects less grease and dust on its exterior and is easier to wipe down than an exposed metal shell. Third, it’s one of the more approachable carpentry projects in a kitchen remodel. You’re building a hollow box, not cutting cabinetry joints, so the skills involved are largely straight cuts, glue, and finish work.
Before You Build: Check Your Clearances and Codes
This is the step most DIY guides skip, and it’s the one that actually protects your kitchen. Building a wood cover around a heat-producing appliance means you’re working with combustible material near a cooktop, so local code has real requirements.
The 2021 International Residential Code sets vertical clearance above the cooking top at not less than 30 inches to combustible material, though that drops to 24 inches if the underside of the cover is protected with insulating millboard and sheet metal, or if a listed metal ventilating hood with a defined air gap is used instead. Several states, including Massachusetts, Texas, Florida, and Virginia, set their own baseline requirement of at least 24 inches between the cooktop and the hood, with 28 to 36 inches recommended for the best capture performance.
If your insert is ducted rather than recirculating, the ductwork itself has its own rule. NFPA 96, the standard most jurisdictions reference for kitchen exhaust, along with the International Mechanical Code, calls for at least 18 inches of clearance between an unenclosed grease duct and any combustible framing member. You can close that gap with a UL-listed, prefabricated duct system rated for reduced clearance, but a standard duct run inside your new wood chase needs the full 18 inches or a fire-rated enclosure around it.
Two practical takeaways: measure from your cooktop surface to where the bottom of your planned cover will sit before you cut any wood, and if your duct run will pass close to the framing, plan the chase wide enough to keep it clear or budget for a listed reduced-clearance product. When in doubt, a quick call to your local building department or a licensed contractor is worth it. Codes vary by city and state, and an inspector’s answer will always beat a forum post.
Materials and Tools You’ll Need
- Your range hood insert, with its width, height, and depth measurements in hand
- 2×2 or 2×4 framing lumber for the internal frame
- 1/4-inch or 3/8-inch plywood (or MDF, for a smoother painted finish) for the outer skin
- Wood glue and a brad nailer with 1-inch and 1.5-inch brads
- Wood screws for anchoring the frame to wall studs
- Trim or lattice molding for the edges, if you want a finished, furniture-grade look
- Caulk, wood filler or lightweight spackle, and 120- to 220-grit sandpaper
- Primer and paint, or stain and polyurethane if you’re going for a natural wood look
- A tape measure, speed square, circular saw or track saw, clamps, and a level
Most homeowner build logs for this exact project land the total materials cost somewhere between $40 and $200, with the spread driven mainly by whether you choose construction-grade plywood or a hardwood like oak or maple, and how much trim detail you add.
Step 1: Measure Your Range Hood Insert
Start with the exact width, height, and depth of your insert, not the space you think it needs. Your finished cover has to slide over or around the insert cleanly, including its mounting brackets and any duct collar on top. Write these numbers down and sketch a rough side profile of the shape you want: a straight box, a tapered chimney shape, or an angled front are all common. Confirm from the manufacturer’s manual how the insert physically attaches, since some units mount with side brackets rather than screwing directly into a frame, which changes how you build the bottom panel.
Step 2: Build the Internal Frame
Cut your 2×2 or 2×4 lumber to build a simple box frame: a top, bottom, back support, and side supports. This frame is what actually carries the weight, so anchor it to wall studs, not just drywall, using wood screws. The frame effectively replaces the cabinet that a built-in hood would normally sit inside, so it needs to be square, level, and solidly fastened before you add any skin material.
Step 3: Plan Ductwork and Ventilation Cutouts
Before closing anything in, mark where the duct collar or vent opening on your insert lines up with your ceiling or wall penetration. If you’re running ducted exhaust, this is where the 18-inch clearance rule from NFPA 96 becomes a design constraint rather than an afterthought: build the frame with enough depth that the duct run doesn’t hug the framing lumber. For a ductless, recirculating insert, you’ll instead need an opening that lets the filtered air vent back into the room, per the manufacturer’s spec.
Step 4: Skin the Frame with Plywood
Once the frame is secure, cut your plywood or MDF panels for the front and two sides. Clamp matching pieces together before cutting so both sides come out identical, a trick that saves a surprising amount of sanding later. Attach the panels to the frame with wood glue and brad nails, working from the bottom up. If your design includes a tapered or angled front, this is where you’ll miter the top edges to get a clean line where the panels meet.
Step 5: Install the Range Hood Insert
With the shell built, slide the insert into place following the manufacturer’s mounting instructions. Because the process mirrors how a factory under-cabinet range hood gets installed, you can generally follow the same steps in the included manual. Secure the mounting brackets, then move on to the connections before you seal up the cover permanently.
Step 6: Connect Electrical and Ductwork
Wire the light and fan according to the manual, and if you’re not fully comfortable with electrical work, this is the point to bring in a licensed electrician rather than guess. Connect the ductwork next, taping every joint so the run is airtight; a loose duct joint is one of the more common reasons a range hood underperforms after a DIY install. If you chose a gas range for your cooktop, double-check that your hood’s CFM rating is adequate for the BTU output before you close everything in, since retrofitting airflow after the cover is finished is far more work.
Step 7: Add Trim and Seal the Seams
This step is what separates a cover that looks store-bought from one that looks like a DIY project. Add trim or lattice molding along the edges if your design calls for it, then caulk every seam, corner, and gap between panels. Fill nail holes and any uneven joints with wood filler or lightweight spackle, let it cure, and sand the entire surface smooth. Skipping this stage is the single most common mistake in DIY hood cover builds. Rough seams and visible nail holes are far more noticeable once paint goes on than they are on bare wood.
Step 8: Prime and Paint (or Stain)
Apply a coat of primer to seal the wood and even out the surface, then finish with paint that matches or complements your cabinetry, or a stain and polyurethane topcoat if you’re keeping a natural wood look. Two coats of paint generally give a more durable, cleanable finish than one, which matters given the hood’s exposure to cooking grease and steam.
Why a Custom Cover Is Worth the Weekend
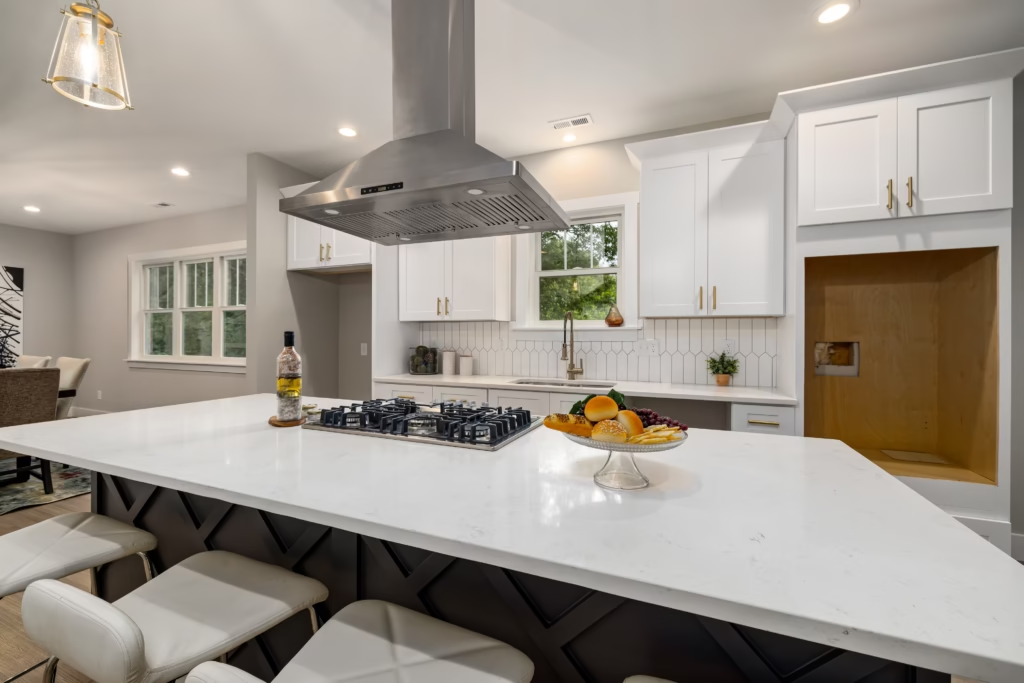
Beyond looks, a well-built range hood cover earns its place in a kitchen in a few concrete ways. It gives an otherwise generic insert a design identity that matches the rest of the room, whether that’s shaker-style panels, shiplap, or a smooth painted chimney shape. It shields the insert’s exterior from scratches, dents, and the buildup that comes with daily cooking, which can extend how long the unit looks presentable even if the internals eventually need service. Flat or lightly textured wood surfaces are also simpler to wipe down than the grilles and seams on many stock hood housings. And because you’re building with common lumber and plywood, a cover built from durable materials and finished properly can last as long as the cabinetry around it.
Final Thoughts
Building a custom range hood cover is genuinely one of the more accessible upgrades you can take on in a kitchen. The core skills are basic framing, straight cuts, and patient finish work, and most builders wrap it up in a weekend. The part that actually takes planning isn’t the woodworking, it’s confirming your clearances and duct routing against code before you commit to a design. Get that right, measure twice, and take your time on the caulk-and-paint stage, and you’ll end up with a hood cover that looks like it came with the kitchen. For more on choosing the right insert before you build around it, see our guide to under-cabinet range hood options, or browse our full kitchen appliances category for related buying guides.
This article is for general informational purposes. Clearance and ventilation requirements vary by state and municipality; confirm current local code requirements with your building department or a licensed contractor before beginning construction.

Hey, My name is MAMON. I am a SEO content creator and affiliate marketer with over 8 years of experience. I create honest product reviews, in-depth buying guides, and practical how-to articles to help readers make informed decisions. My mission is to provide trustworthy, research-backed content that delivers real value.
Leave a Reply