Plumbing a kitchen sink with both a garbage disposal and a dishwasher trips up a lot of first-time DIYers, not because any single step is hard, but because the two appliances have to connect to each other in a specific order for everything to drain correctly. Get the sequence right and it’s a straightforward afternoon project. Get it wrong, usually by forgetting the knockout plug or skipping backflow protection, and you’ll be pulling everything apart again. Below is the full process for how to plumb a kitchen sink with disposal and dishwasher, including the code requirement most DIY guides skip entirely.
Key Takeaways
- Always turn off the water supply and disconnect power to the disposal before starting any work under the sink.
- If you’re installing a new garbage disposal, the dishwasher inlet knockout plug must be removed before you mount the disposal, not after.
- Your dishwasher drain line needs backflow protection, either an air gap fitting or a high loop, and which one your local code requires depends on whether your area follows the UPC or IPC.
- Test every connection with the water running before you close up the cabinet, since a slow drip under the sink is far easier to fix before the cabinet floor gets wet.
Tools and Materials You’ll Need

Gather everything before you start so you’re not making mid-project trips to the hardware store:
- Adjustable wrench and pipe wrench
- Hammer and flathead screwdriver (for the knockout plug)
- Hacksaw or utility knife
- Needle-nose pliers
- Plumber’s putty
- Hose clamps (typically two, sized for the dishwasher drain hose)
- Air gap fitting (if your local code requires one) or zip ties for a high loop
- Dishwasher drain connector kit
- Wire nuts, if the disposal isn’t pre-wired with a cord
Step 1: Turn Off Water and Power
Shut off the water supply valves under the sink completely, and unplug the garbage disposal or switch it off at the breaker if it’s hardwired. Skipping this step is the single most common cause of DIY plumbing injuries and flooding, so don’t skip it even for what feels like a quick job.
Step 2: Install the Garbage Disposal
If you’re installing a new disposal rather than reconnecting an existing one, the sequence matters:
- Remove the dishwasher knockout plug first. Every new disposal ships with a plastic or metal plug sealing the dishwasher inlet port on the side of the unit. Lay the disposal on its side, insert a screwdriver into the inlet, and tap it sharply with a hammer until the plug breaks free. Retrieve the loose plug from inside the grinding chamber with needle-nose pliers before you go any further. Skip this step and your dishwasher simply won’t drain once everything is connected, since the water has nowhere to go.
- Prep the sink flange. Apply a rope of plumber’s putty around the flange and press it into the sink’s drain opening from above.
- Assemble the mounting hardware. From underneath, stack the backup flange, fiber gasket, and mounting ring onto the flange, then install the snap ring and tighten the three mounting screws evenly. Wipe away excess putty that squeezes out.
- Wire the disposal. Remove the wire cover plate on the bottom of the unit, connect the wires by matching colors (black to black, white to white, green or bare copper to ground), and secure with wire nuts. Reattach the plate.
- Hang the disposal. Align the three mounting tabs on the disposal with the mounting ring and rotate until they lock into place.
- Connect the discharge tube. Attach the discharge tube to the disposal’s outlet with the provided flange and bolts, then connect it to your drain trap assembly.
For model-specific torque and clearance details, InSinkErator’s official installation guide is worth reviewing before you start, since small details vary slightly between disposal brands and horsepower ratings.
Step 3: Understand Dishwasher Backflow Protection (Air Gap vs. High Loop)
This is the step most DIY tutorials skip, and it’s a code requirement, not an optional upgrade. Without some form of backflow protection, wastewater from a clogged sink drain can siphon backward into your dishwasher. The EPA’s Cross-Connection Control Manual identifies the air gap as the most reliable backflow prevention method available, since it has no moving parts to fail.
There are two accepted methods, and which one your project needs depends on your local plumbing code:
- Air gap fitting: A small cylindrical device mounted above the countertop or sink deck, usually next to the faucet. It creates a true physical break between the dishwasher drain hose and the disposal or drain line. Jurisdictions that have adopted the Uniform Plumbing Code (UPC), including California, typically require this device and will fail an inspection without it.
- High loop: The dishwasher drain hose is routed up as high as possible under the countertop and secured to the underside of the counter or cabinet before running down to the disposal or drain connection. Many areas that follow the International Plumbing Code (IPC) or the 2024 International Residential Code accept this as sufficient, since it uses elevation rather than a physical break to prevent backflow.
Check with your local building department before you decide, since this is one of the few steps where the “correct” method genuinely depends on where you live.
Step 4: Install the Air Gap (If Required)
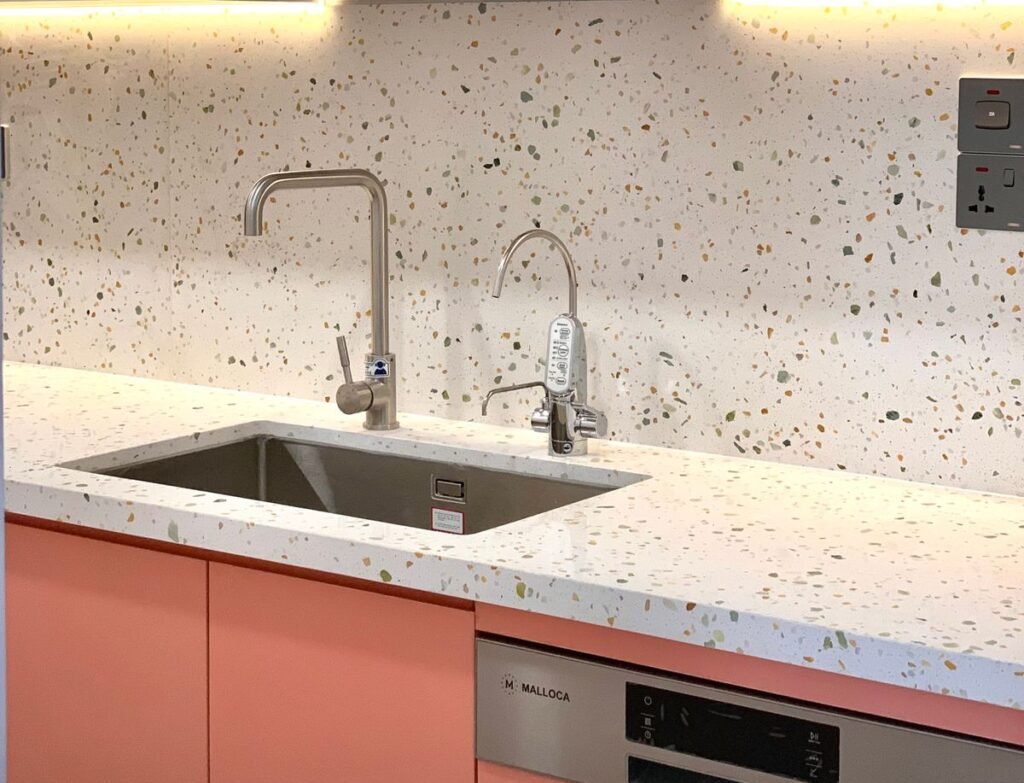
If your local code calls for a physical air gap fitting:
- Insert the threaded stem of the air gap fitting into the mounting hole in the sink deck or countertop (many sinks include a dedicated knockout hole for this).
- Slide the rubber washer onto the stem from below and hand-tighten the mounting nut. Don’t use pliers or a wrench here, hand-tight is all that’s needed and over-tightening can crack the fitting.
- Rotate the air gap by hand until the angled nozzle underneath points toward the garbage disposal.
- Connect one hose from the dishwasher to one side of the air gap’s lower nozzle, and a second hose from the air gap’s other nozzle to the disposal’s dishwasher inlet. Secure both ends with hose clamps.
Step 5: Connect the Dishwasher Drain Hose
Whether you’re using an air gap or a high loop, the connection to the disposal itself works the same way:
- Push the dishwasher drain hose (or the hose coming from the air gap) onto the disposal’s dishwasher inlet nozzle.
- Secure it with a hose clamp, tightening until snug but not so tight that you crack the plastic nozzle.
- If you’re using a high loop instead of an air gap, route the hose to the highest practical point under the counter, secure it there with a zip tie or bracket, and then run it down to the disposal inlet.
- Trim any excess hose length with a utility knife so the run is clean, without kinks, sags, or loops that could trap standing water.
Step 6: Turn the Water and Power Back On, and Test
Once everything is connected, restore the water supply and power to the disposal. Run the disposal briefly to confirm it operates normally, then run a full dishwasher cycle while someone watches every connection point under the sink, the disposal’s dishwasher inlet, the air gap or high loop, the drain trap, and the sink flange, for even a slow drip. It’s far easier to snug a hose clamp now than to discover a leak after the cabinet floor has already absorbed water.
Wondering whether you can use the disposal in the middle of a dishwasher cycle once everything is hooked up? Our guide on whether you can run a garbage disposal while the dishwasher is running explains when it is fine and what causes backups.
Watch: Connecting a Dishwasher to a Garbage Disposal
This video from The Spruce walks through the different ways a dishwasher drain hose can be connected, including to a garbage disposal inlet, so you can match it to your own setup.
Common Mistakes to Avoid
- Forgetting the knockout plug. This is by far the most common installation error, and it’s much harder to fix once the disposal is already mounted under the sink.
- Skipping backflow protection entirely. Running the dishwasher hose straight to the disposal with no air gap or high loop isn’t just a code violation in most areas, it also risks dirty water siphoning back into your dishwasher.
- Overtightening plastic fittings. Disposal inlets and air gap nozzles are plastic and can crack under too much torque from a wrench. Hand-tight plus a snug hose clamp is usually enough.
- Not testing before closing up. A five-minute test run while the cabinet is still open saves a much bigger cleanup later.
If You’re Also Updating the Sink or Faucet
If this project is part of a larger sink swap, our kitchen sink buying guide covers what to look for in a new basin before you start cutting into your countertop. If you’re dealing with supply line or shutoff valve issues at the same time, our guide to fixing a loose kitchen faucet covers the water-supply side of under-sink work. Once everything’s connected, our breakdown of how much hot water a dishwasher actually uses can help you plan for the ongoing utility cost.
Frequently Asked Questions
Do I need an air gap, or is a high loop good enough?
It depends on your local plumbing code. UPC jurisdictions (including California) typically require a physical air gap device. IPC jurisdictions, common across much of the Midwest and East Coast, generally accept a properly secured high loop. Check with your local building department if you’re unsure.
Why won’t my dishwasher drain after I installed a new garbage disposal?
The most common cause is a knockout plug still sealing the disposal’s dishwasher inlet. If you didn’t remove it before mounting the disposal, the dishwasher has nowhere to send its water.
Can I connect a dishwasher directly to a sink drain without a garbage disposal?
Yes. Without a disposal, the dishwasher drain hose connects to a dedicated dishwasher tailpiece or wye fitting on the drain assembly instead of a disposal inlet, but it still needs the same air gap or high loop backflow protection.
How do I know if my area follows the UPC or IPC?
Call your local building or permits department. They can tell you which model code your jurisdiction has adopted, usually in under a minute.
Do I need a permit to install a garbage disposal or connect a dishwasher?
Requirements vary by city and county. Many areas don’t require a permit for a like-for-like appliance swap but do for new drain lines or countertop modifications. Check locally before you start if you’re unsure.
Conclusion
Plumbing a kitchen sink with disposal and dishwasher comes down to getting the order right: mount the disposal with the knockout plug already removed, choose the backflow protection method your local code actually requires, connect the dishwasher drain hose cleanly without kinks, and test everything before you call it done. Skip the knockout plug or the backflow protection and you’ll be back under the sink within days. Get both right the first time, and this is a project most homeowners can finish in an afternoon without calling a plumber.

Hey, My name is MAMON. I am a SEO content creator and affiliate marketer with over 8 years of experience. I create honest product reviews, in-depth buying guides, and practical how-to articles to help readers make informed decisions. My mission is to provide trustworthy, research-backed content that delivers real value.
Leave a Reply