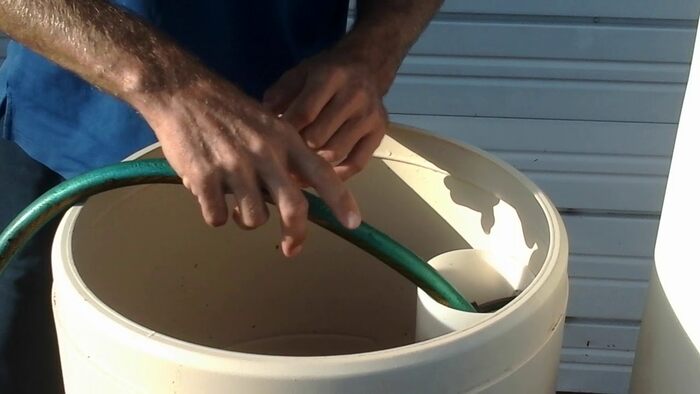
How to clean a water softener resin tank: pour a resin cleaner (a rust and iron stain remover made for softeners) into the brine tank, run a manual regeneration cycle so the cleaner works through the resin bed, then flush the system until the water runs clear. That’s the core process. It typically takes under an hour of hands-on work, and doing it once or twice a year keeps your resin beads exchanging ions efficiently instead of quietly losing capacity to iron and sediment.
The resin tank is where the actual water softening happens: thousands of tiny, negatively charged resin beads attract calcium, magnesium, and iron out of your water and swap them for sodium. Over time, those beads accumulate iron, manganese, sediment, and sometimes bacteria, which reduces how well they exchange ions. If you’ve noticed rusty or discolored water, a sulfurous odor, or water that just doesn’t feel as soft as it used to, the resin bed is the first place to check. Here’s exactly how to clean a water softener resin tank, step by step, along with how to tell the resin tank and brine tank apart, since cleaning methods for each are different.
Key Takeaways
- Resin cleaner (an iron/rust remover made for water softeners) goes in the brine tank and works through the resin bed during a manual regeneration cycle, not directly into the resin tank itself on most residential units.
- Bleach is for sanitizing the brine tank against bacteria and mold, not for dissolving iron from the resin bed; using the wrong product for the wrong job is the most common resin-cleaning mistake.
- Most manufacturers recommend cleaning the resin bed once a year, or up to quarterly if you have high iron or manganese in your water.
- Heavily fouled resin may need two or three regeneration cycles with fresh cleaner to fully clear, and if performance doesn’t improve, the resin itself may need replacing.
Why the resin tank needs cleaning
Resin beads exchange ions through a negative charge that attracts positively charged minerals in your water, primarily calcium and magnesium, but also iron and manganese if your water source has them. Iron is the troublemaker: as ferrous iron dissolved in the water contacts oxygen, it oxidizes into ferric iron, an insoluble form that coats resin beads instead of being cleanly exchanged and flushed out during regeneration. Once enough beads are coated in iron or sediment, they can’t grab calcium and magnesium as effectively, and you start seeing symptoms of a softener that’s technically running but not really working.
Signs it’s time to clean the resin tank include:
- Water with a rusty, brown, or discolored tint, especially right after the tap has been off for a while
- A sulfurous, rotten-egg smell coming from your water
- Soap that doesn’t lather well or water that feels harder than it should, even though the softener is regenerating on schedule
- Visible buildup or staining on fixtures despite the softener supposedly running
Resin tank vs. brine tank: know the difference
A lot of confusion around cleaning a water softener comes from mixing up its two tanks, and the old advice to just “clean it with water and bleach” usually applies to only one of them.
- The resin tank holds the actual resin beads and is where ion exchange happens. It’s typically sealed and isn’t meant to be opened and manually scrubbed on most residential units. You clean it chemically, in place, using a resin cleaner run through a regeneration cycle.
- The brine tank stores salt and water to create the brine solution used during regeneration. This one can be physically opened, emptied, and scrubbed out with mild soap and water, or sanitized with a diluted bleach solution if you suspect bacteria, mold, or that sulfur smell.
How to clean a water softener resin tank: step-by-step
Every softener brand has its own manual, so check yours first for model-specific guidance. That said, the process below applies to the vast majority of residential ion-exchange softeners.
- Choose your timing. Clean the resin tank when salt levels are low, so you’re not disposing of a nearly full load of brine, and pick a stretch of a few hours when the household won’t need water.
- Select the right resin cleaner. Look for a product labeled specifically as a water softener resin cleaner or iron/rust stain remover, such as Iron Out or an equivalent. If your water tests high in one particular mineral, like iron, a cleaner formulated for that mineral works better than a general-purpose one.
- Dissolve and add the cleaner. Follow the product’s mixing instructions, then pour the solution into the brine tank (or brine well, on units that have one). If your unit has no separate brine tank, add it to the salt tank while salt levels are low.
- Locate the regeneration control. Find the regeneration knob or button near the control valve. On manual units, a flathead screwdriver turned counterclockwise typically triggers regeneration mode; digital units usually have a button or menu option for a manual regen cycle.
- Run the regeneration cycle. This reverses water flow through the resin bed, drawing the cleaning solution and sodium-rich brine through the beads to dissolve and flush out iron, manganese, and sediment.
- Repeat if needed. For heavily fouled resin, add a fresh dose of cleaner and run a second (or third) regeneration cycle. Check whether the water coming out is running clearer each time.
- Return the system to normal operation. Turn the regeneration control back to its standard position once cycles are complete.
- Flush the system. Run a nearby faucet for about 10 minutes to clear any remaining cleaning solution from the lines before using water normally again.
Cleaning the brine tank separately
If the brine tank itself looks dirty, has visible sediment at the bottom, or you suspect bacterial growth (a common cause of that rotten-egg smell), clean it on its own schedule:
- Shut off the water supply to the softener and switch it to bypass mode.
- Drain the brine tank completely, using a wet/dry vacuum if needed to remove standing water and leftover salt.
- Scrub the interior with a mild dish soap and water, rinsing thoroughly.
- For sanitizing against bacteria or mold, mix a diluted bleach solution, roughly a quarter cup of bleach per 2 to 3 gallons of water, let it sit for about 15 minutes, then rinse thoroughly before refilling with salt.
- Refill with fresh salt and run a manual regeneration cycle to bring the system back online.
Watch: removing iron buildup from a water softener
This walkthrough shows the resin cleaning process in action, including how to mix and apply an iron/rust remover during a regeneration cycle.
How often should you clean the resin tank?
Most manufacturers recommend cleaning the resin bed about once a year as routine maintenance. If your water source has high iron, manganese, or sediment, such as well water in many parts of the U.S., quarterly cleaning is often a better target to prevent fouling from building up between cycles. This is separate from the softener’s regular regeneration cycle, which handles calcium and magnesium under normal operation; resin cleaning with a dedicated product addresses the minerals that regular regeneration doesn’t fully clear. For guidance on how often your specific system should run its normal regeneration cycle, see our guide to water softener regeneration frequency.
What to avoid
- Don’t use vinegar as a primary resin cleaner. It can dissolve some mineral buildup, but it’s meaningfully less effective than a purpose-made resin cleaner and isn’t a reliable substitute for regular fouling.
- Don’t put hydrogen peroxide in the brine tank. It can interfere with the ion exchange process and potentially damage system components.
- Don’t skip the manufacturer’s manual. Cleaner concentrations, compatible products, and regeneration steps vary by brand, and using the wrong approach can void a warranty on some units.
When cleaning isn’t enough
If you’ve run two or three cleaning and regeneration cycles and the water still isn’t clearing up, or output hardness tests still show hard water breaking through, the resin itself may be too fouled or too old to recover. USGS notes that resin capacity degrades permanently with heavy mineral exposure over time, and most resin media has a practical lifespan of 10 to 15 years even with good maintenance. If your system is within that window and still underperforming after cleaning, check whether the resin bed itself needs replacing rather than just cleaning. It’s also worth confirming your softener is correctly sized for your household and water hardness; our guide on how water softeners work covers the underlying ion exchange process in more detail if you want the full picture.
Frequently asked questions
Can I use bleach directly in the resin tank?
Bleach is generally used to sanitize the brine tank, not poured directly into the resin bed, since it’s not formulated to dissolve iron and mineral deposits the way a dedicated resin cleaner is. Always check your manufacturer’s manual, since some brands specifically warn against bleach contact with resin media.
How do I know if it’s the resin tank or brine tank causing problems?
A sulfurous odor or visible sediment in the salt itself usually points to the brine tank; declining softening performance, rusty water, or resin beads that look coated or discolored when inspected point to the resin bed. When in doubt, address the brine tank first since it’s easier to inspect directly.
Do I need to add salt before or after cleaning the resin tank?
Add fresh salt after cleaning is complete and the system has been flushed. Our guide on what happens if your water softener runs out of salt covers keeping salt levels consistent between cleanings.
Will cleaning the resin tank fix low water pressure?
It can help if the pressure drop is caused by fouled resin restricting flow, but persistent low pressure after cleaning may point to a different issue, like a clogged inlet screen or an undersized system. Check your control valve settings, covered in our guide on adjusting water softener dials, before assuming the resin is the culprit.
Final thoughts
Now you know how to clean a water softener resin tank: the right resin cleaner, run through a manual regeneration cycle, clears out the iron and sediment that regular softening doesn’t catch. Keep the resin tank and brine tank cleaning routines separate, since they call for different products and different problems. Stay on top of it once or twice a year, and your resin bed will keep exchanging ions efficiently for its full working life instead of quietly losing capacity in the background.

Hey, My name is MAMON. I am a SEO content creator and affiliate marketer with over 8 years of experience. I create honest product reviews, in-depth buying guides, and practical how-to articles to help readers make informed decisions. My mission is to provide trustworthy, research-backed content that delivers real value.
Leave a Reply