Key Takeaways
- Coarse stones (#1000 or below) are for repairing chips and very dull edges, not routine sharpening.
- Medium stones (#1000-#3000) handle most regular kitchen knife sharpening.
- Fine and finishing stones (#4000-#8000+) polish an already-sharp edge to a razor finish.
- Most home cooks only need two stones: one medium, one fine, used in sequence.
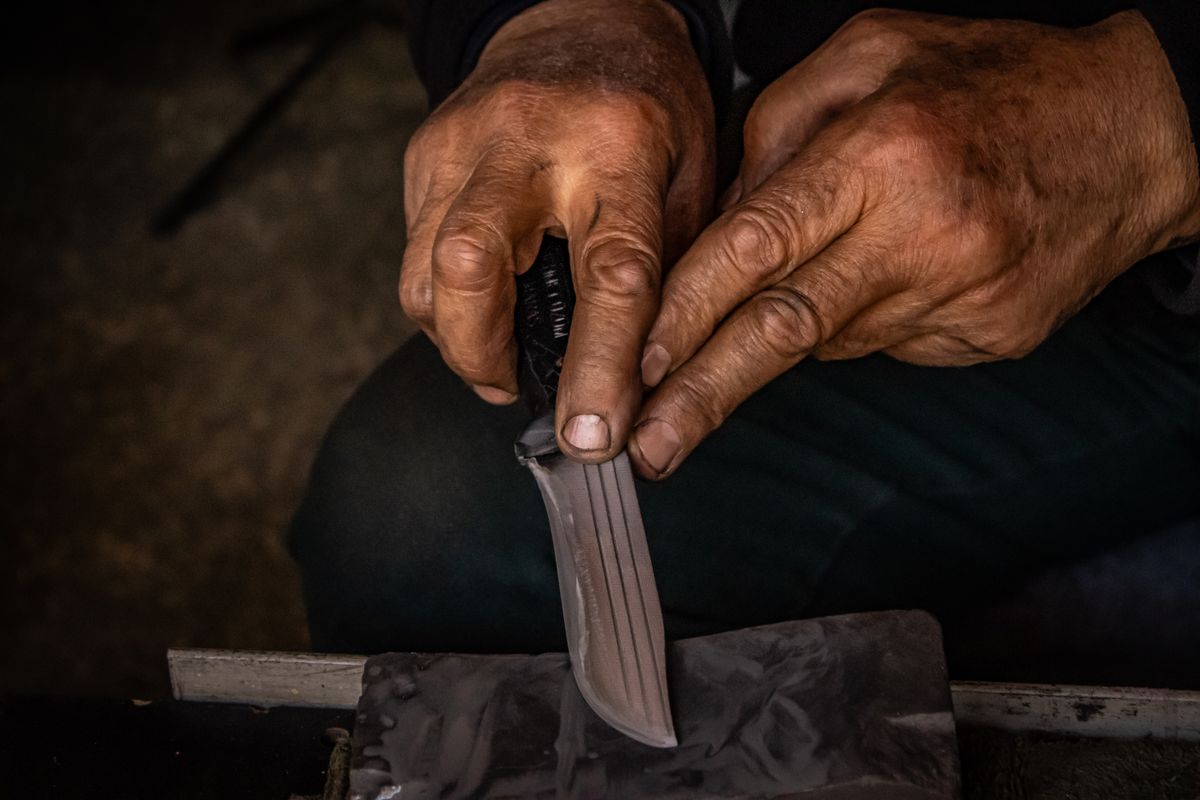
If you’ve ever asked what grit whetstone for kitchen knives you actually need, the honest answer is that it depends on how dull the knife is, not on chasing the highest number on the box. Grit size measures how coarse or fine the abrasive particles in the stone are: lower numbers cut fast and remove more metal, higher numbers refine and polish. Using the wrong one wastes a stone’s lifespan or leaves you sharpening for twice as long as necessary. It also matters which material the stone itself is made from, and how you maintain it over time, not just the grit number printed on the box. Here’s how to pick the right grit for the job in front of you, and how to keep whichever stone you choose working properly for years.
What Is a Grit Whetstone?
A whetstone is a flat abrasive stone used to sharpen a blade by grinding a small amount of metal away to form a new edge. The number printed on the side, like #1000 or #6000, refers to the density of the abrasive grit: the higher the number, the finer and more tightly packed the particles, and the smoother the resulting surface. A low-grit stone feels rough to the touch and removes metal quickly; a high-grit stone feels almost polished and removes very little per pass.
This is the foundation of choosing what grit whetstone for kitchen knives fits your situation: whetstones fall into three broad bands, and each one exists for a different stage of sharpening, not as interchangeable options.
1. Coarse Whetstones (#1000 or Less): For Very Dull or Damaged Blades
Coarse stones are for repair work, not routine maintenance. If a blade has visible nicks, chips, or has gone so dull it barely cuts a tomato, a coarse stone in the #220-#1000 range removes enough material to reshape the edge and grind out the damage. Because it removes metal aggressively, using a coarse stone for everyday touch-ups will wear down a good knife far faster than necessary. After coarse sharpening, the edge will feel functional but rough, and it needs a finer stone afterward to refine it.
2. Medium Whetstones (#1000-#3000): For Regular Sharpening
This is the range most home cooks will use most often. A #1000 stone is the standard starting point for a knife that’s lost its edge but isn’t damaged, while #2000 and #3000 stones suit cooks who sharpen more frequently and want less abrasion each time. This band does the actual work of restoring a genuinely sharp edge; it’s not meant to maintain one long-term; that’s what the next tier is for. If you’re not sure which single stone to buy first, a #1000 grit stone is the most defensible one-stone answer for most kitchen knife steels, since it works across carbon, stainless, and high-carbon stainless blades alike.
3. Fine and Finishing Whetstones (#4000-#8000+): For a Razor Edge
Once a blade has a solid edge from a medium stone, fine and finishing stones in the #4000-#8000 range polish that edge rather than reshape it. Stones around #4000-#5000 refine the edge for general kitchen use; #5000-#8000 stones are for cooks who want the closest thing to a razor finish, typically for delicate produce and precise fish or meat cuts where a rougher edge would tear rather than slice cleanly. Going beyond #8000 moves into specialist territory better suited to straight razors than kitchen knives.
A Note on Grit Standards: JIS vs. Other Scales
Not all grit numbers mean the same thing across brands. Most whetstones sold for kitchen knives use the Japanese Industrial Standard (JIS), but a few, particularly some Western-made stones, follow different grading systems like FEPA or ANSI, which measure particle size differently. A #1000 JIS stone and a #1000 stone on another scale won’t necessarily cut at the same rate, even though the number on the box looks identical.
In practice, this rarely causes problems if you stick with a single, reputable brand and its full stated range, since the stones are calibrated consistently against each other. It matters more if you’re mixing stones from different manufacturers into one sharpening progression, where a jump from a #1000 to a #3000 stone from two different scales might feel like a much bigger or smaller step than the numbers suggest. When in doubt, check the manufacturer’s own comparison chart rather than assuming every #1000 stone behaves identically.
Whetstone Grit Quick Reference
| Grit Range | Purpose | How Often to Use |
|---|---|---|
| #220-#1000 | Repair chips, reshape a very dull edge | Rarely, only for damage or neglect |
| #1000-#3000 | Restore a genuinely sharp edge | Every few weeks to months, depending on use |
| #4000-#8000+ | Polish and refine an already-sharp edge | After medium sharpening, or for touch-ups |
How to Actually Use a Whetstone
Technique matters as much as grit choice. Soak or splash the stone with water if it’s a water stone (check the manufacturer’s instructions first), then set it on a damp towel or non-slip mat so it can’t shift. Hold the blade at a consistent angle, typically around 15 degrees for Japanese-style knives and 20 degrees for Western-style ones, and draw the edge across the stone in smooth, even strokes. America’s Test Kitchen’s step-by-step whetstone guide is a solid technique reference if you’re doing this for the first time, particularly for checking when one side has formed a burr and it’s time to flip the blade.
The burr is the real signal to watch for, not a stroke count. After enough passes on one side, you’ll feel a thin ridge of displaced metal along the opposite edge if you run a finger gently across it (never along it). That burr means the stone has ground all the way through to form a new edge, and it’s time to flip the blade and repeat the process on the other side. Once a burr forms on both sides in turn, alternate lighter strokes on each side to remove the burr itself, then move up to the next grit if you’re using more than one stone. Rinse the blade and dry it immediately once you’re done, the same way you would after washing, since a freshly sharpened edge is no more rust-resistant than any other part of the knife.
Synthetic vs. Natural Whetstones
Grit number aside, what the stone is actually made of changes how it behaves. Synthetic stones, typically aluminum oxide or silicon carbide bonded into a consistent block, are the practical choice for most kitchens: they cut predictably, the grit rating on the label is accurate and consistent from stone to stone, and they cost a fraction of natural alternatives. Natural whetstones, quarried rather than manufactured, can produce a finer, more nuanced edge prized by some professional sharpeners, but grit consistency varies by quarry and even by section of the same stone, and prices climb quickly for genuine Japanese natural stones.
For nearly everyone trying to decide what grit whetstone for kitchen knives to buy first, a synthetic combination stone is the more sensible starting point. Natural stones are worth exploring later, as a refinement once you already have consistent technique, not as a first purchase.
How to Flatten and Maintain a Whetstone
A whetstone doesn’t wear evenly. The center, where most sharpening strokes happen, wears down faster than the edges, and a dished stone stops producing a consistent, flat edge no matter how good your technique is. Checking a stone against a straightedge every few sharpening sessions will show if it has developed a noticeable dip.
Flattening is done with a flattening stone or a sheet of wet-dry sandpaper on a flat surface, working the whetstone in circular or figure-eight motions until the surface is even again. Softer, faster-cutting stones need this more often than harder finishing stones. Skipping flattening doesn’t just produce a worse edge; it also wastes more of the stone over time, since an uneven surface forces you to apply uneven pressure to compensate.
Between uses, let a water stone air-dry completely before storing it, since stones left wet can develop mold or, for stones with any binder material, gradually break down. A dry cloth wipe and a few minutes of air-drying is usually enough.
One Stone or Several? Building a Simple Sharpening Kit
You don’t need all three grit bands to keep a kitchen knife in good shape. For most home cooks, a two-stone combination, one medium stone around #1000 and one fine stone around #4000-#6000, covers the vast majority of sharpening needs: the medium stone restores the edge, the fine stone refines it. A two-stone system is genuinely enough for most kitchens, and reaching for a coarse repair stone only when a blade is actually damaged rather than routinely dull. If your knife does end up with surface rust after storage or a missed drying step, that’s a separate problem from dullness; our guide on how to get rid of rust on a knife covers that safely without touching the edge itself.
A sharp knife is also a safer knife, since dull blades slip rather than cut cleanly. If sharpening habits are new to you, our guide on how to prevent cuts in the kitchen covers grip and technique that pair naturally with a freshly sharpened edge.
Frequently Asked Questions
What grit whetstone for kitchen knives should a beginner buy first?
A #1000 grit stone. It’s coarse enough to restore a dull edge but not so aggressive that it’s easy to damage a blade while learning technique.
Can one whetstone do everything?
Not well. A single stone can get a blade functional, but a two-stone combination, one medium and one fine, produces a noticeably better and longer-lasting edge.
How often should I use a coarse whetstone?
Rarely. Coarse stones are for chips, damage, or knives that have gone completely unmaintained for a long time, not for regular sharpening.
Is a higher grit number always better for a kitchen knife?
Not for everyday cutting. Extremely high grits (above #8000) polish toward a razor finish better suited to specialty blades than the daily wear of a kitchen knife.
Do I need to flatten a new whetstone before first use?
Usually not immediately, but check it against a straightedge after the first few sharpening sessions. New stones are flat out of the box; the dishing happens gradually with use.
Are synthetic or natural whetstones better for a beginner?
Synthetic. They cut more predictably, the grit rating is consistent, and they cost far less, which matters while you’re still developing consistent angle and pressure.
Bottom Line
What grit whetstone for kitchen knives you need comes down to the condition of the blade in front of you, not the highest number available. Reach for a coarse stone only to repair real damage, use a medium stone for the regular work of restoring an edge, and finish with a fine stone when you want the sharpest possible result. Keeping just two stones on hand, one medium and one fine, will cover nearly everything a home kitchen needs.

Hey, My name is MAMON. I am a SEO content creator and affiliate marketer with over 8 years of experience. I create honest product reviews, in-depth buying guides, and practical how-to articles to help readers make informed decisions. My mission is to provide trustworthy, research-backed content that delivers real value.
Leave a Reply