

A gooseneck kettle pour over setup gives you one thing a regular kettle cannot: control. The thin, curved spout lets you choose exactly where the water lands, how fast it falls, and when it stops. Because pour-over coffee is just hot water moving through ground coffee, that control decides whether your cup tastes sweet and balanced or sour and thin. This guide walks you through the full routine, from heating the water to the final drip, with the temperatures, ratios, and timings that specialty coffee professionals use.
You do not need barista training to get this right. In fact, most of the skill comes down to three habits: a steady pour, a correct water temperature, and a timer. Once those are in place, a gooseneck kettle makes pour-over coffee repeatable from one morning to the next.
Key Takeaways
- The Specialty Coffee Association brewing range is 198–205°F, a few degrees below a full boil at sea level.
- Start with a ratio near 1:16, such as 20 g of coffee to 320 g of water.
- Bloom the grounds with twice their weight in water for 30–45 seconds before the main pour.
- Total brew time for a single cup should land between 3 and 4 minutes.
- At high altitude, water boils below 205°F, so set your kettle to boil instead of a lower preset.
Why a Gooseneck Kettle Matters for Pour Over

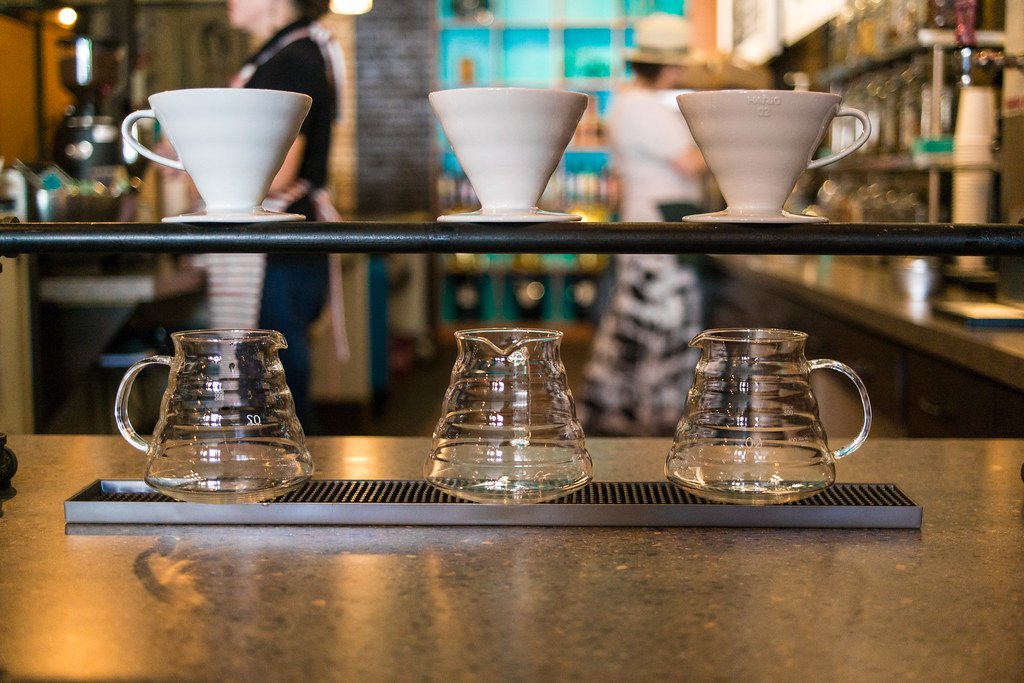
Photo: nan palmero via Flickr (CC BY 2.0).
A standard kettle has a wide, short spout built to empty water quickly. That works for tea bags and instant oatmeal. However, pour-over coffee needs a slow, narrow stream that you can aim at a specific spot in the dripper. A gooseneck spout starts low on the body and rises in a long S-curve, which slows the water and keeps the stream thin even when the kettle is full.
This matters because extraction depends on contact. For that reason, a gooseneck kettle pour over usually tastes cleaner than one made with a standard spout. Water that crashes into the grounds in one heavy splash digs a channel and rushes through the center. As a result, some coffee is over-extracted and bitter while the rest is under-extracted and sour. A gentle, even stream wets every particle, so the flavors dissolve at a more uniform rate.
There is also a safety benefit. Since the spout sits far from your hand and the flow is gentle, you are less likely to splash boiling water over the rim of the dripper. If you are still choosing a kettle, our guide to the best electric kettle models compares gooseneck options with temperature presets.
What You Need Before You Start
Luckily, gooseneck kettle pour over brewing uses a small set of tools. Each one removes a variable, so the only thing left to adjust is your technique. Together, they turn a gooseneck kettle pour over into a repeatable recipe.
- Gooseneck kettle: An electric model with temperature control is easiest, though a stovetop gooseneck plus a thermometer also works.
- Dripper: Popular choices include the Hario V60, Kalita Wave, and Chemex.
- Paper filter: Match the size and shape to your dripper.
- Digital scale: One that reads in 0.1 g steps and includes a timer is ideal.
- Burr grinder: Fresh, even grounds make the biggest single difference in flavor.
- Fresh whole-bean coffee: Look for a roast date on the bag.
A grinder deserves special mention. Uneven grounds extract at different speeds, which no pouring technique can fully fix. Our coffee grinder and brewer buyer’s guide explains the difference between burr and blade grinders. If you only own a blender for now, you can still follow our steps for grinding coffee beans in a blender as a temporary fix.
Here is a simple starting recipe for one large mug. Every number scales up or down evenly, so doubling it for two people is straightforward.
| Variable | Starting Point | Adjustable Range |
|---|---|---|
| Coffee dose | 20 g | 15–30 g |
| Water | 320 g | 1:15 to 1:17 ratio |
| Water temperature | 200–203°F | 198–205°F |
| Bloom | 40 g for 40 seconds | 30–45 seconds |
| Grind size | Medium-fine, like table salt | Finer for V60, coarser for Chemex |
| Total brew time | 3:30 | 3:00–4:00 |
What Water Temperature Should You Use?
The short answer is 198–205°F. That is the brewing range recommended by the Specialty Coffee Association, as summarized by Coffee Magazine. Water in that window pulls out sugars and acids efficiently without dragging out as many harsh, woody compounds.
Roast level shifts the ideal point within the range. Light roasts are dense and harder to extract, so they usually taste better near 205°F. Dark roasts dissolve more easily; therefore, many people prefer them closer to 198°F to avoid a burnt, ashy finish. Medium roasts sit comfortably around 200–203°F.
Altitude is the other factor. Water boils at a lower temperature as air pressure drops, which caps how hot your brew water can get. Data from Colorado State University Extension shows the effect clearly:
| Elevation | Boiling Point | What It Means for Pour Over |
|---|---|---|
| Sea level | 212°F | Use a 200–205°F preset |
| 5,000 ft (Denver area) | 203°F | Boil and pour right away |
| 7,500 ft | 198°F | Boiling water is the bottom of the range |
| 10,000 ft | 193°F | Grind finer and extend brew time |
In other words, a 205°F preset is impossible above roughly 4,000 feet. Consequently, a gooseneck kettle pour over in Denver needs slightly different settings than one in Miami. Many temperature-control kettles will simply run until the water boils, but a few will keep heating and waste energy. If you live in the Mountain West, choose the boil setting and start pouring as soon as the kettle clicks off.
Gooseneck Kettle Pour Over: Step-by-Step Method
The method below works with any cone or flat-bottom dripper. Read through it once, and then follow along with your scale running. In short, every gooseneck kettle pour over follows the same six stages.
1. Heat More Water Than You Need
To begin, fill the kettle with about 500–600 g of water for a 320 g brew. The extra covers rinsing the filter and preheating your mug. Then set the temperature for your roast level. An electric gooseneck at 1,200 W heats half a liter in roughly 2–3 minutes, based on the energy needed to warm water from tap temperature.
2. Rinse the Filter and Preheat
Next, place the paper filter in the dripper and pour hot water over it until it is fully wet. This removes papery flavors and warms the dripper so it does not steal heat from the brew. Afterward, discard the rinse water from your mug or carafe.
3. Grind and Level the Coffee
First, weigh 20 g of beans and grind them medium-fine. Pour the grounds into the filter, then give the dripper a gentle shake to level the bed. As a result, the water meets the same depth of coffee everywhere. Finally, place everything on the scale and tare it to zero.
4. Bloom the Grounds

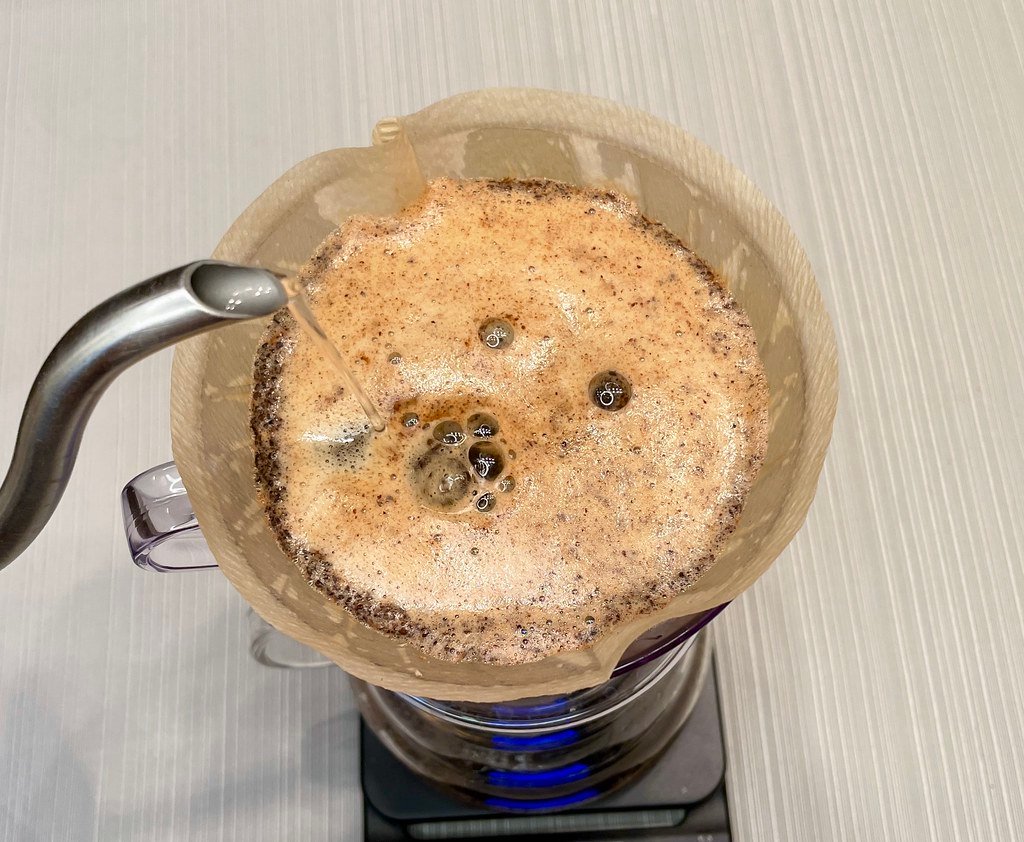
Photo: markolaz via Flickr (CC BY 2.0).
Start your timer and pour about 40 g of water, which is twice the weight of the coffee. Meanwhile, use small circles from the center outward so every ground gets wet. The bed will puff up and bubble as trapped carbon dioxide escapes. That gas would otherwise push water away from the coffee, so letting it vent for 30–45 seconds leads to a more even extraction.
Notably, fresh coffee blooms dramatically. By contrast, beans that are many weeks past their roast date barely rise at all, which is a useful freshness test in itself.
5. Pour in Slow, Steady Circles
At about 0:45, begin the main pour. Hold the kettle so the spout is 1–2 inches above the coffee bed. Then pour in slow spirals, moving from the center outward and back again, but avoid pouring directly onto the paper walls. Water that hits the filter runs down the side and skips the coffee entirely.
Aim to reach 320 g by about 2:15. That works out to roughly 280 g of water in 90 seconds, or a little over 3 g per second. A gooseneck kettle makes this pace easy to hold because the stream stays the same width even as the kettle gets lighter.
6. Let It Draw Down
After the last pour, give the dripper a gentle swirl to flatten the bed. The remaining water should drain through by 3:00–4:00. If the bed finishes flat with no grounds stuck high on the walls, your gooseneck kettle pour over was even.

Video: Tanner Colson walks through a full pour-over brew.
Pulse Pouring vs Continuous Pouring
There are two main ways to add the water after the bloom. Both work, and each one suits a different kind of brewer. Either way, the gooseneck kettle pour over stream should stay thin and steady.
Pulse pouring splits the water into several smaller pours, often three or four of 70–100 g each. You pause between pulses so the water level drops a little. This keeps the slurry temperature steadier and gives you more chances to correct your aim. As a result, many beginners find pulses more forgiving.
By comparison, continuous pouring adds all the water in one slow stream. Since the water level stays constant, the flow through the bed is very consistent. Even so, it requires a steady hand and a kettle that can hold a thin stream for 90 seconds without sputtering.
Try each method with the same beans on back-to-back mornings. After all, taste is the only real judge, and your preference may change from one coffee to the next.
Tips for Popular Pour Over Drippers

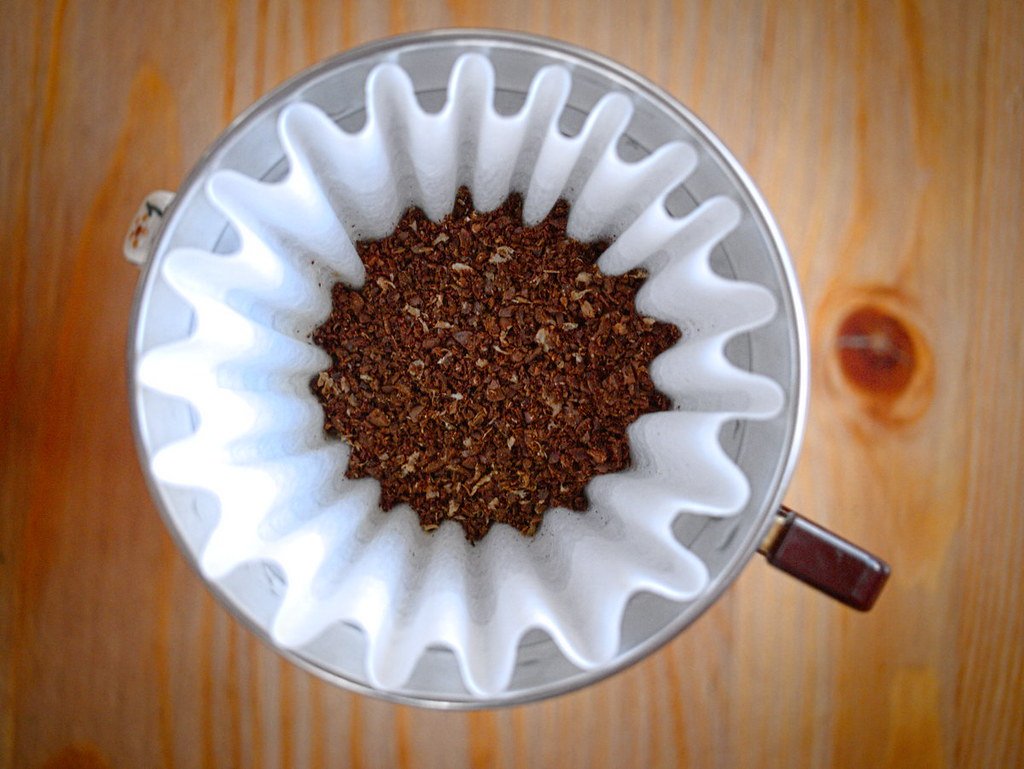
Photo: Olgierd Pstrykotwórca via Flickr (CC BY 2.0).
Hario V60
The V60 has a single large hole and spiral ribs, so water flows quickly. Because of that, your pour rate controls brew time more than with any other dripper. Use a slightly finer grind and keep the spout low. In addition, a continuous pour often works well here.
Kalita Wave
The Wave has a flat bottom with three small holes, which slows the drawdown and makes it more forgiving. Pulse pours of about 60–80 g suit it nicely. Also, pour mostly into the center, because the wavy filter already spreads the water.
Chemex
Chemex filters are much thicker than standard papers, so they need a coarser grind. A typical brew uses 30–50 g of coffee and takes 4–5 minutes. For that reason, a kettle with at least 0.9 L capacity is helpful if you brew a full carafe.
Common Pour Over Mistakes and How to Fix Them
Fortunately, most bad cups trace back to a short list of causes. Use this table to diagnose what went wrong with a gooseneck kettle pour over and adjust one variable at a time.
| Problem | Likely Cause | Fix |
|---|---|---|
| Sour, thin taste | Under-extraction | Grind finer or raise water temperature |
| Bitter, dry finish | Over-extraction | Grind coarser or lower temperature |
| Brew finishes in under 2:30 | Grind too coarse or pour too fast | Go one step finer, slow the stream |
| Brew stalls past 4:30 | Fine particles clogging the filter | Go coarser and avoid stirring hard |
| Grounds stuck high on the filter | Pouring onto the walls | Keep circles inside the coffee bed |
| Flat, muted flavor | Stale beans or scale buildup | Buy fresher coffee, descale the kettle |
That last row is easy to overlook. Minerals from hard water collect inside the kettle and can make the water taste chalky. Descaling every month or two keeps the flavor clean. If your tap water is very hard, our comparison of a water descaler vs water softener explains which fix lasts longer.
How to Choose a Gooseneck Kettle for Pour Over
Not every gooseneck kettle pours equally well. So, before you buy a kettle for gooseneck kettle pour over brewing, check these features:
- Spout diameter: A narrow opening produces a thinner, more controllable stream.
- Temperature control: Look for 1°F steps and a hold function that keeps the water warm for 30–60 minutes.
- Balanced handle: A counterweighted grip keeps your wrist steady through a long pour.
- Capacity: Choose 0.6–0.8 L for single cups or 0.9–1.0 L for a Chemex or two servings.
- Wattage: Typically, electric models draw 1,000–1,200 W, which is plenty for small volumes on a standard 120 V outlet.
On the other hand, stovetop goosenecks are cheaper and silent, but you will need a separate thermometer to hit the target range. Electric models cost more; however, built-in presets remove the guesswork. If you are curious how other brewers compare on heat, our test of which coffee maker makes the hottest coffee shows how many drip machines struggle to reach 198°F at all.
Frequently Asked Questions
Can I make pour over without a gooseneck kettle?
Yes, but it is harder to control the pour. A regular kettle tends to dump water in one stream, which can cause channeling. If you must use one, pour very slowly and in short bursts. Alternatively, a flat-bottom dripper such as the Kalita Wave is more forgiving of uneven pouring.
How long should I wait after the water boils?
At sea level, about 30–45 seconds off the boil brings water close to the 205°F end of the range, although the exact time depends on kettle size and room temperature. A thermometer or a temperature-control kettle removes the guesswork.
What is the best coffee-to-water ratio for pour over?
Most brewers start between 1:15 and 1:17. A 1:15 ratio gives a stronger, heavier cup, while 1:17 is lighter and brighter. For example, 20 g of coffee needs 300 g of water at 1:15 or 340 g at 1:17.
Why is my pour over coffee weak?
Weak coffee usually means too little coffee for the water or a grind that is too coarse. First, weigh both on a scale to confirm your ratio. If the ratio is right, grind one step finer and see if the brew time stretches toward 3:30.
Should I use filtered water?
Filtered water often tastes better because it removes chlorine, which improves any gooseneck kettle pour over. Even so, avoid distilled water, since coffee needs some minerals to extract properly. Our guide to brewing coffee the right way covers water quality in more detail.
Final Thoughts
Learning how to use a gooseneck kettle for pour over takes only a few mornings of practice. Set the water to 198–205°F, weigh your coffee and water at about 1:16, bloom for 30–45 seconds, and pour in slow circles until you reach your target weight around 2:15. From there, taste the cup and change just one variable at a time.
The kettle itself is only part of the equation. Still, its slow, precise stream is what makes every other variable easier to control. Once your gooseneck kettle pour over routine feels natural, you will be able to brew a coffee shop quality cup at home in under five minutes.


Hey, My name is MAMON. I am a SEO content creator and affiliate marketer with over 8 years of experience. I create honest product reviews, in-depth buying guides, and practical how-to articles to help readers make informed decisions. My mission is to provide trustworthy, research-backed content that delivers real value.